Embedding ContentSherpa allows you to add a Hushly Chat Agent directly to your website or asset. The embedded Chat Agent provides visitors with an interactive, AI-powered experience that can answer questions, guide visitors to relevant content, and help them engage with your business.
A Hushly Chat Agent can be configured for the specific website experience and embedded using the generated embed code. Once embedded, visitors can interact with the Chat Agent without leaving the webpage.
Embedding ContentSherpa helps you provide real-time assistance, improve content discovery, and engage website visitors throughout their journey.
To embed ContentSherpa, follow the steps below:
- From the Left Navigation Menu, click Hubs. On the Hubs listing page, select the Hub you want to manage. From the Hub Menu, click DISTRIBUTION, and then click Website Embeds.
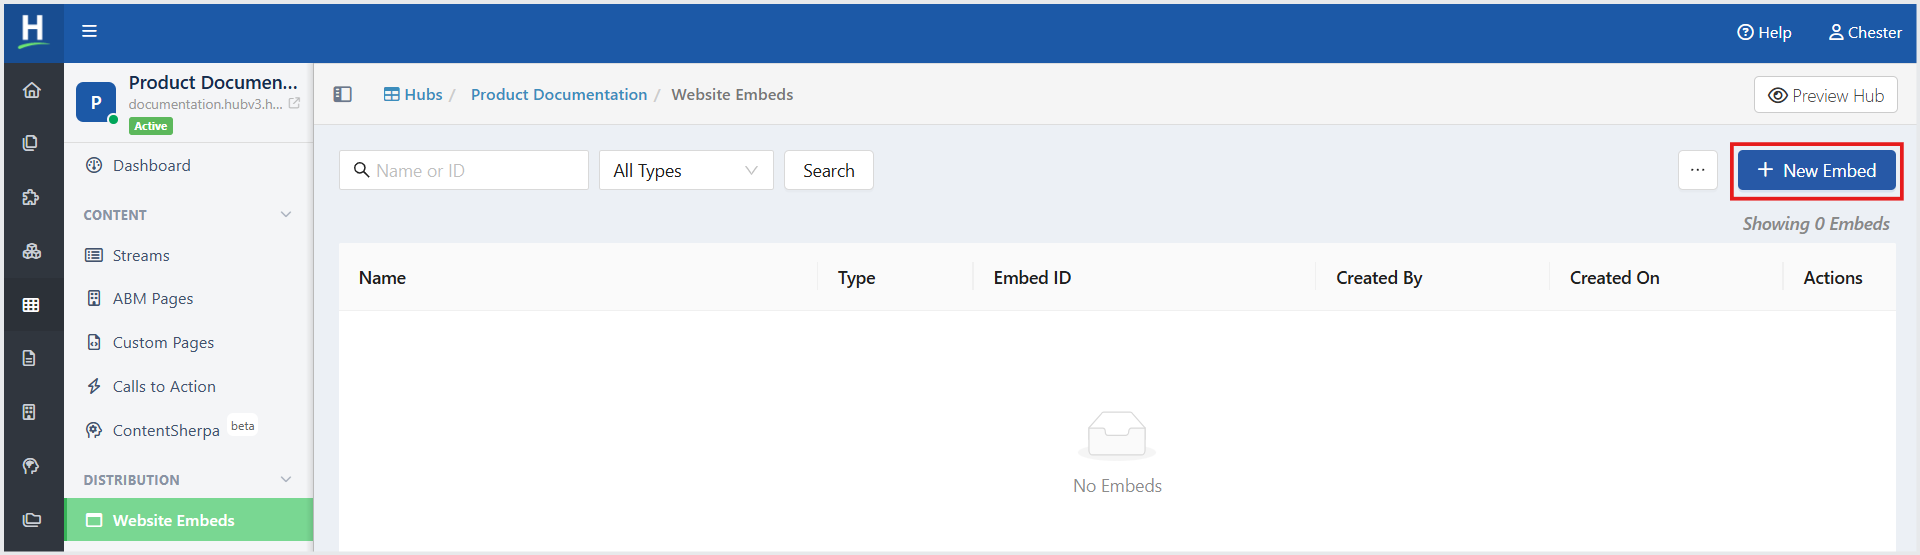
- On the Website Embeds listing page, click +New Embed.
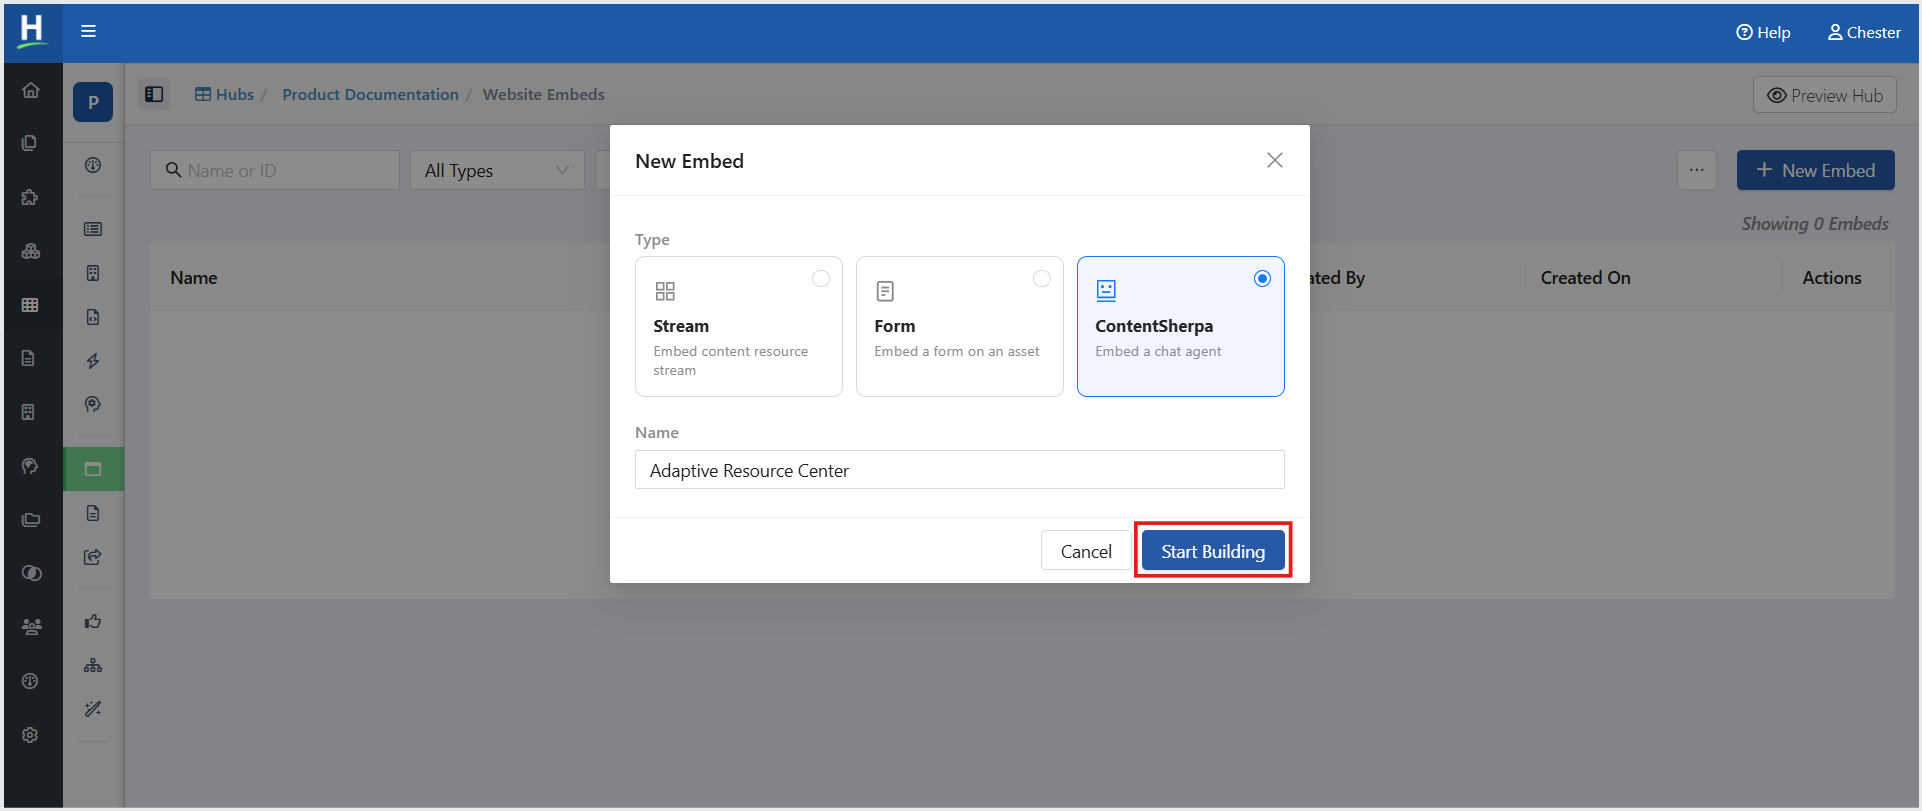
- In the New Embed window, select ContentSherpa as the Type.
- In the Name field, enter a name for the Chat Agent.
- Click Start Building. You are redirected to the Embed Builder, where you can begin designing and configuring your Chat Agent.
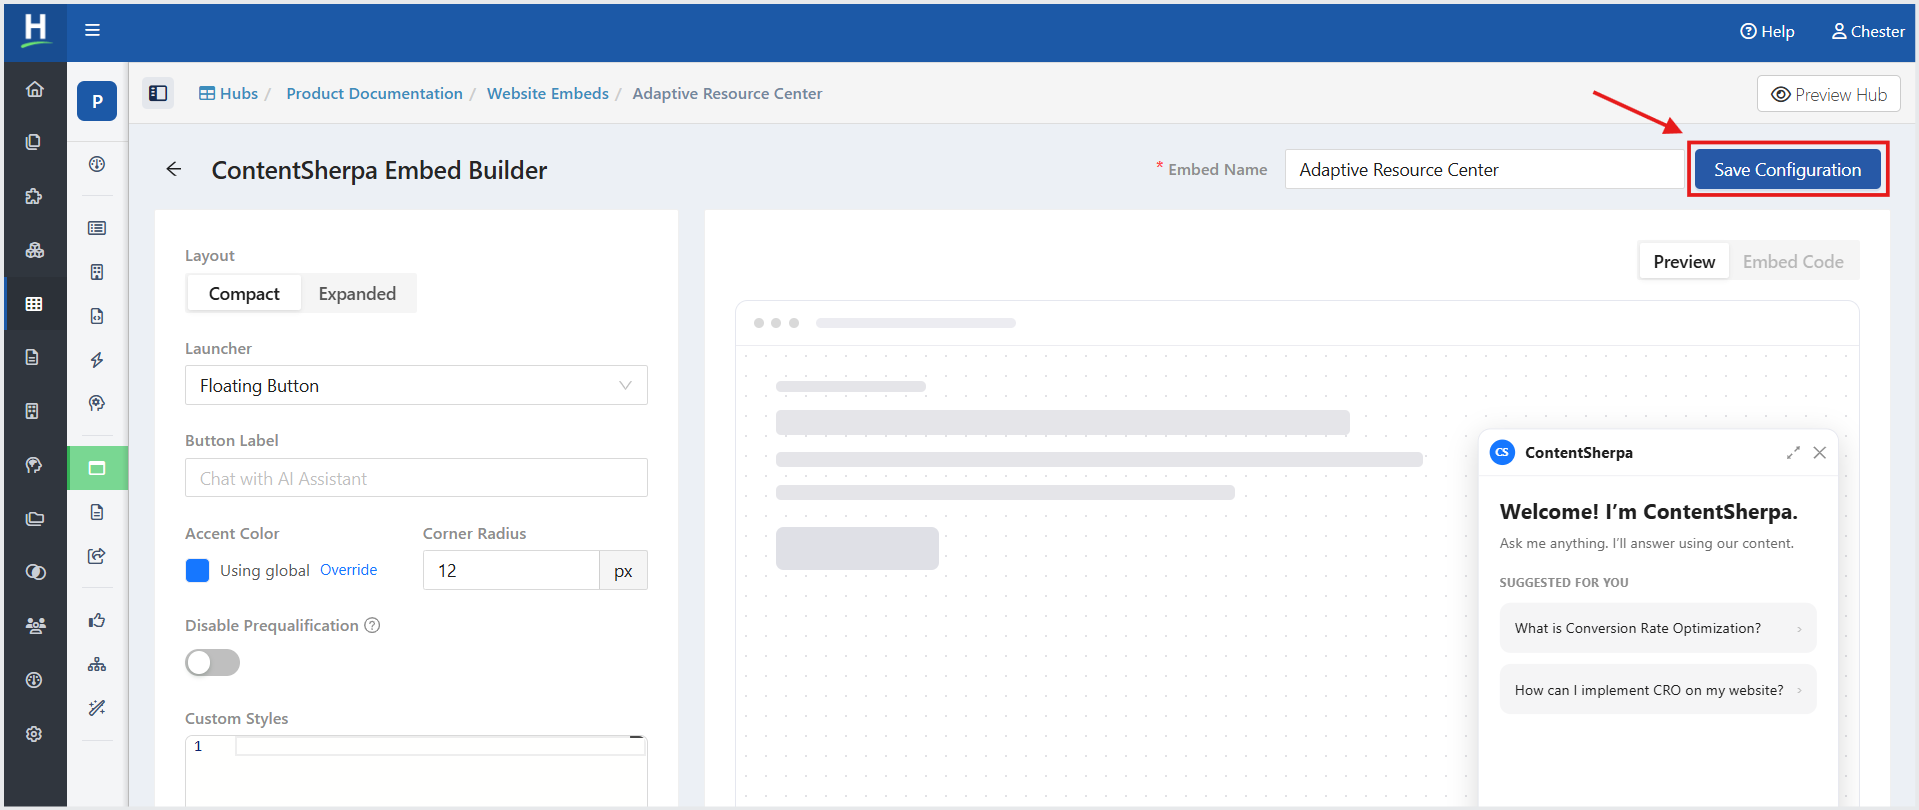
Click Save Configuration.
Copy the ContentSherpa Embed Code
After configuring the Chat Agent, you can copy the embed code and add it to the desired webpage or webpages.
- Click the Embed Code tab.
- Under Embed Type, select the required embed format:
- HTML — Use the HTML embed code to embed the ContentSherpa directly on a webpage.
- Tag — Use the embed tag format.
- Click Copy to copy the ContentSherpa embed code.
- Paste the copied code into the desired webpage or webpages where you want to embed the ContentSherpa .
Important: You must install the Hushly Embed Tag along with the embed code.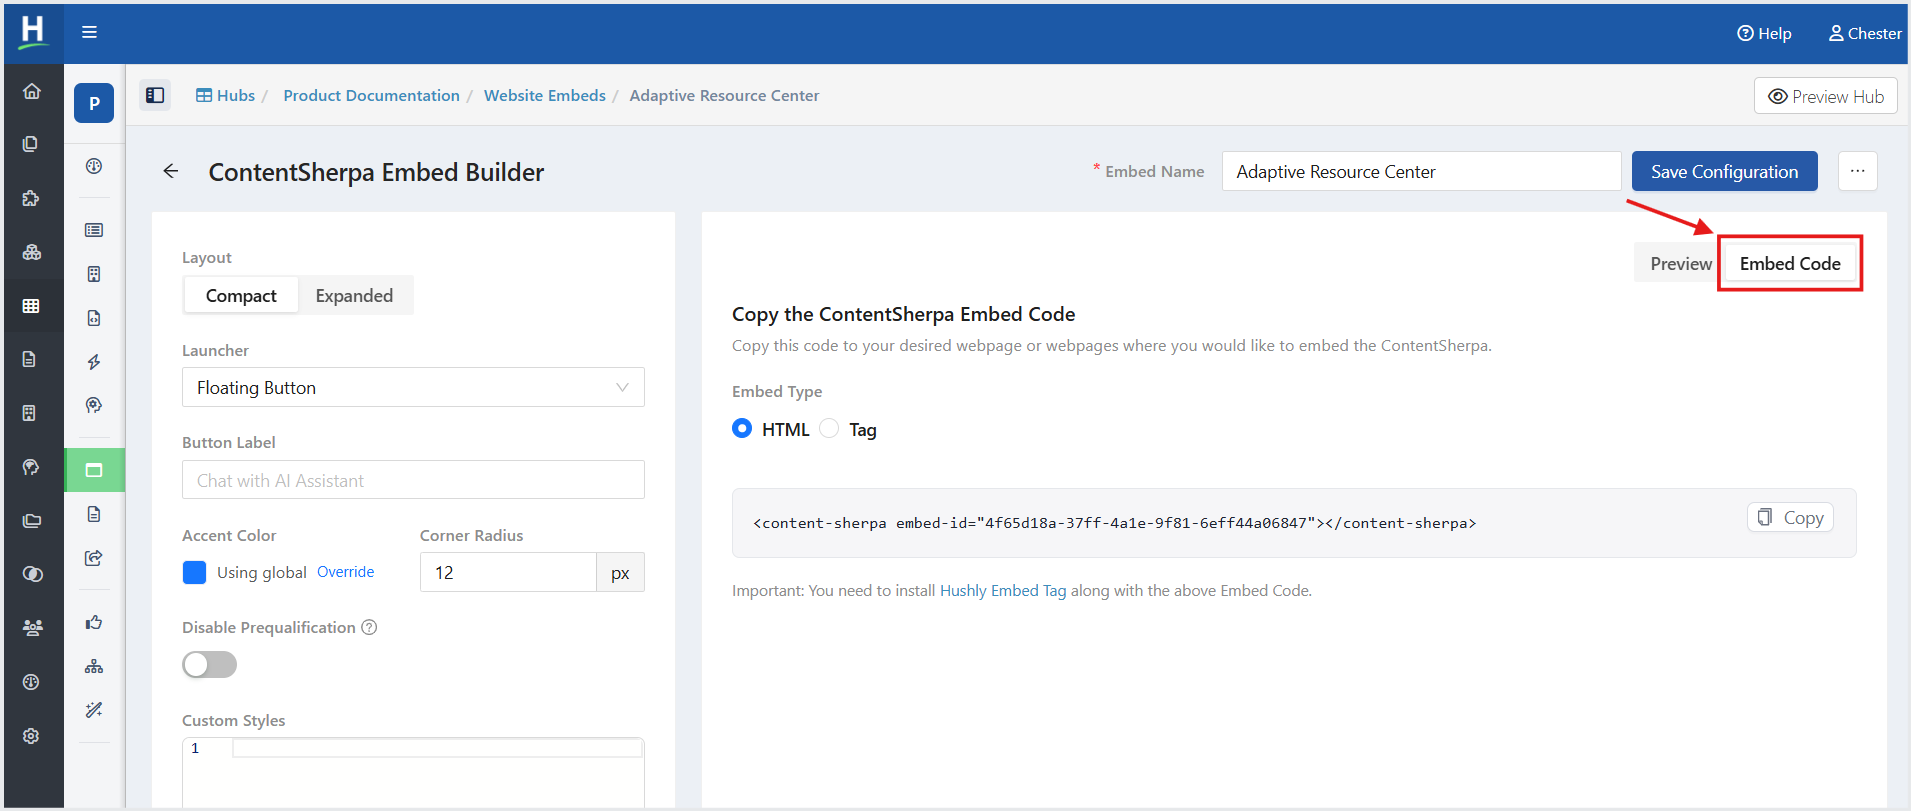
ContentSherpa Embed Settings
Customize the appearance of the ContentSherpa launcher.
Layout
Choose how the widget interface is displayed on your page:
- Compact: Renders a streamlined, space-saving layout.
- Expanded: Displays the full widget interface with maximum visibility.
Launcher Settings
- Launcher Type: Select how the widget trigger appears on your page (currently set to Floating Button via the dropdown).
- Button Label: Customize the text displayed on the launcher button. Enter your preferred call-to-action (e.g., "Chat with AI Assistant").
Styling & Appearance
- Accent Color: Defines the primary color theme of the widget. By default, it uses global site settings. Click Override to select a custom color (represented by the blue color square).
- Corner Radius: Adjust the roundness of the widget's edges in pixels (default set to 12 px).
Advanced Options
- Disable Prequalification: Toggle this switch On to bypass pre-engagement questions or qualification steps before initiating an interaction.
- Custom Styles (CSS): Input custom CSS rules directly into the code editor box to override default styles when the embed renders on your page.
Related Articles:
Was this article helpful?
That’s Great!
Thank you for your feedback
Sorry! We couldn't be helpful
Thank you for your feedback
Feedback sent
We appreciate your effort and will try to fix the article