A Stream is a curated collection of content resources that can be displayed to website visitors in an organized and engaging format. It helps you present relevant content, such as articles, ebooks, videos, and other resources, in a single stream.
Content Resource Streams can be configured and embedded into webpages, allowing visitors to easily browse and access the resources that are most relevant to them.
To embed a Stream, follow the steps below:
- From the Left Navigation Menu, click Hubs. On the Hubs listing page, select the Hub you want to manage. From the Hub Menu, click DISTRIBUTION, and then click Website Embeds.
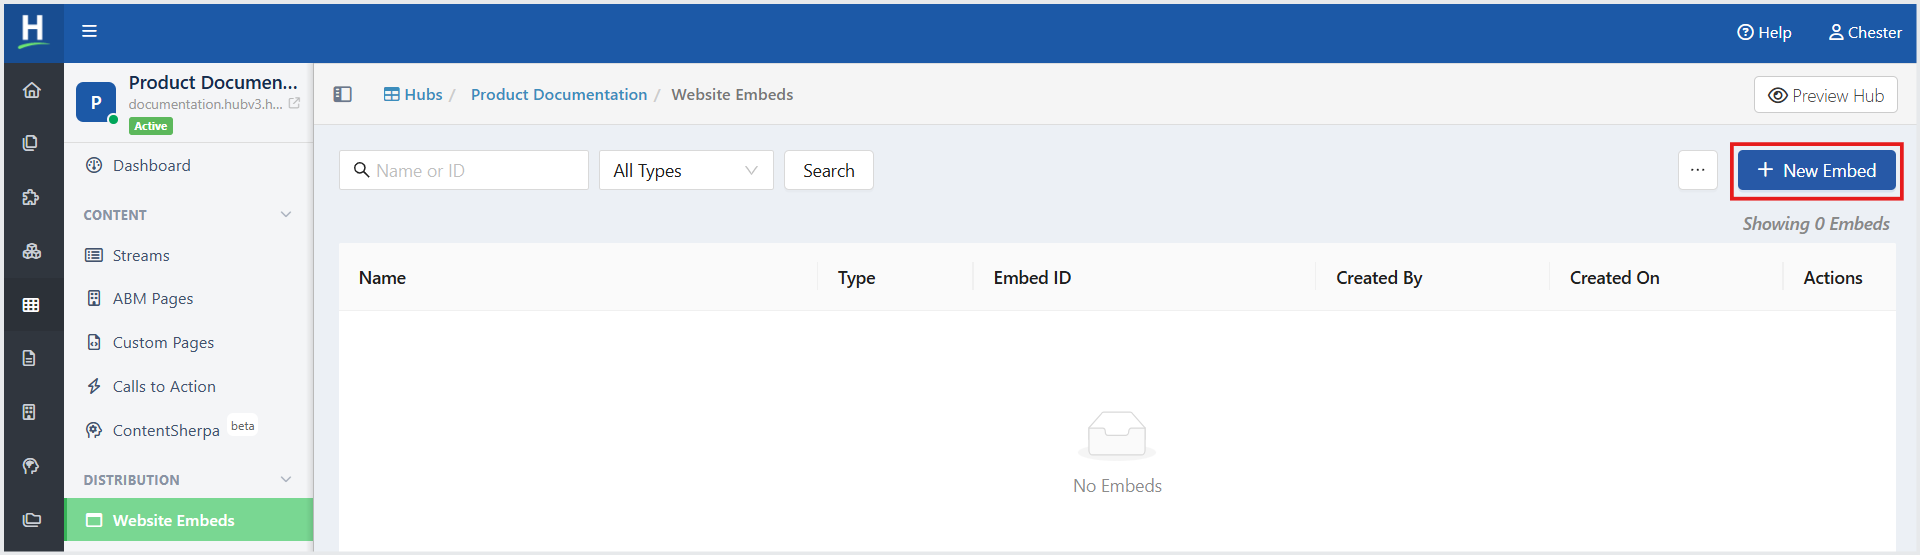
- On the Website Embeds listing page, click +New Embed.
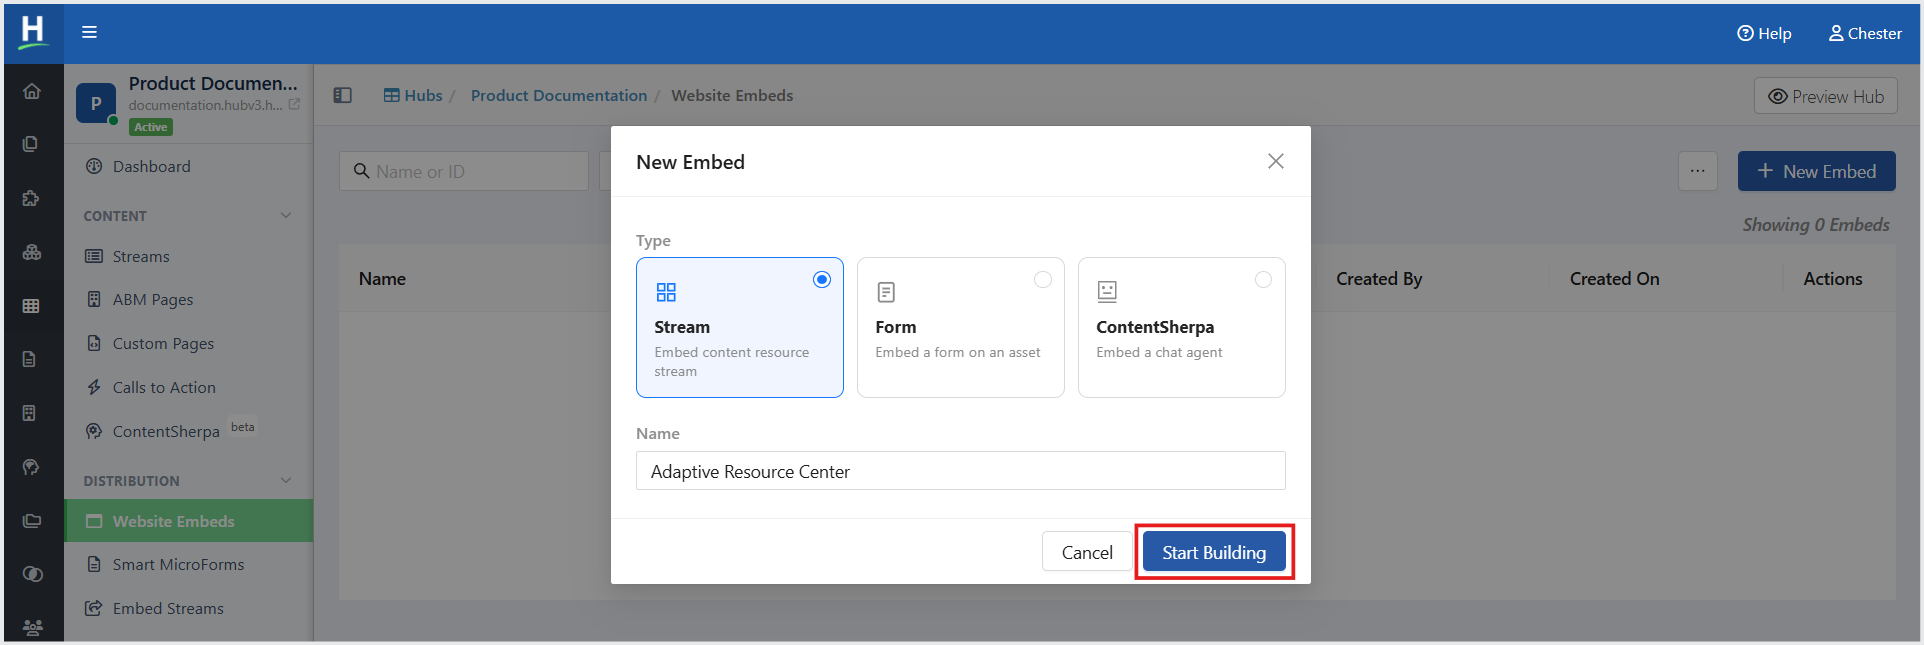
- In the New Embed window, select Stream as the Type.
- In the Name field, enter a name for the Website Embed.
- Click Start Building. You are redirected to the Embed Builder, where you can begin designing and configuring your Embed Stream.
Adding Streams
You can add a Stream to a Website Embed and configure the default stream, asset display order, segment-based personalization, and the maximum number of items displayed. On the Embed Builder page, in the Content tab, click + Add.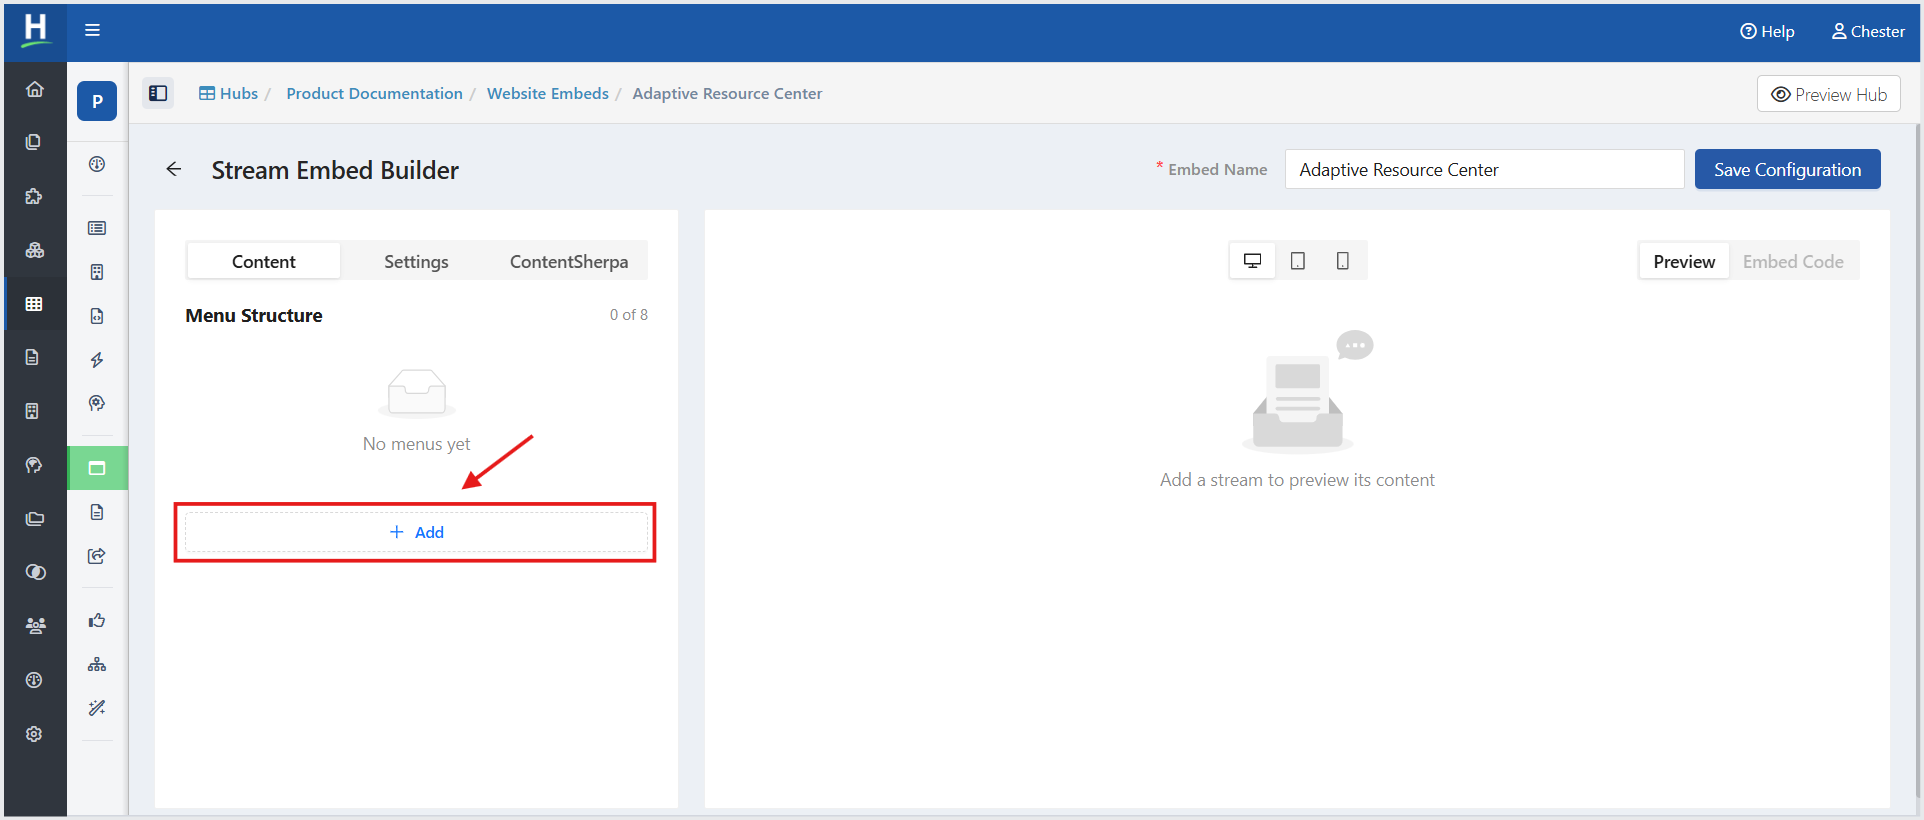
- In the Add Stream window, enter a Stream Label. This field is optional. If left blank, the label defaults to the stream's page title.
- Under DEFAULT STREAM, select the required Stream from the picklist.
- In Asset Display Order, select how assets should be displayed. Sequential displays assets in sequence.
- To personalize the Stream for specific visitor segments, under PERSONALIZE BY SEGMENT, click Add Segment.
- Configure the required segment and its corresponding Stream and filters. Visitors who match the segment see the configured Stream and filters. Other visitors see the Default Stream.
- In Max Items, specify the maximum number of items to display. This setting applies to the Default Stream and all configured segments.
- Click Done.
Note: A Stream must be selected in the Stream field before you can complete the configuration.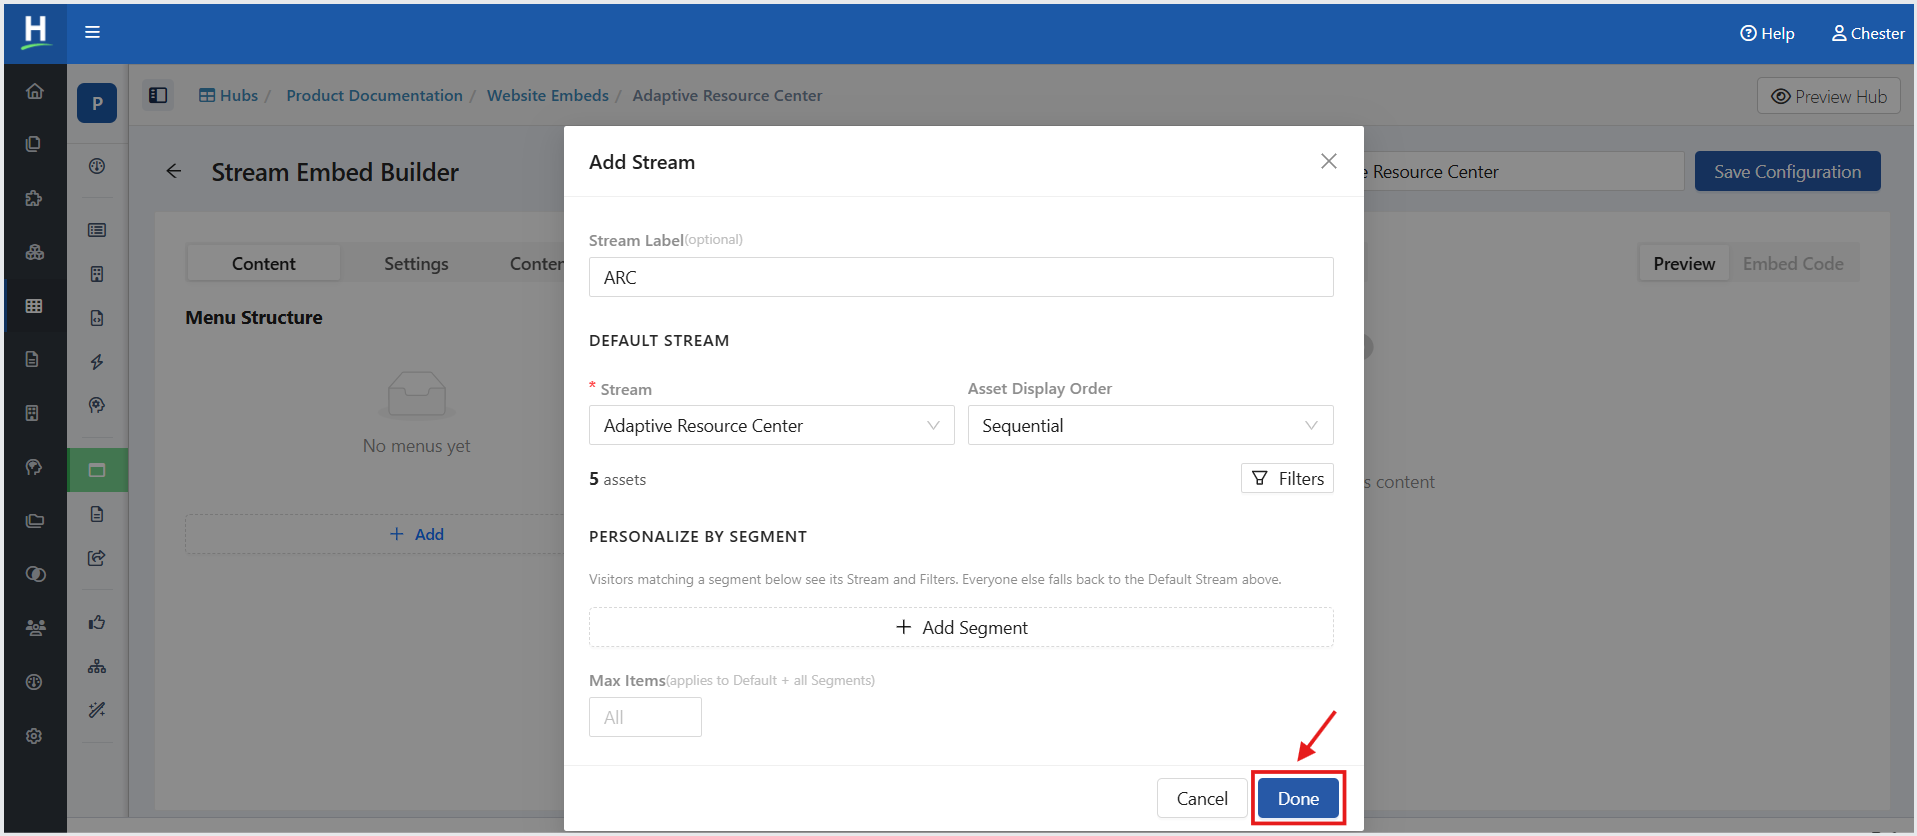
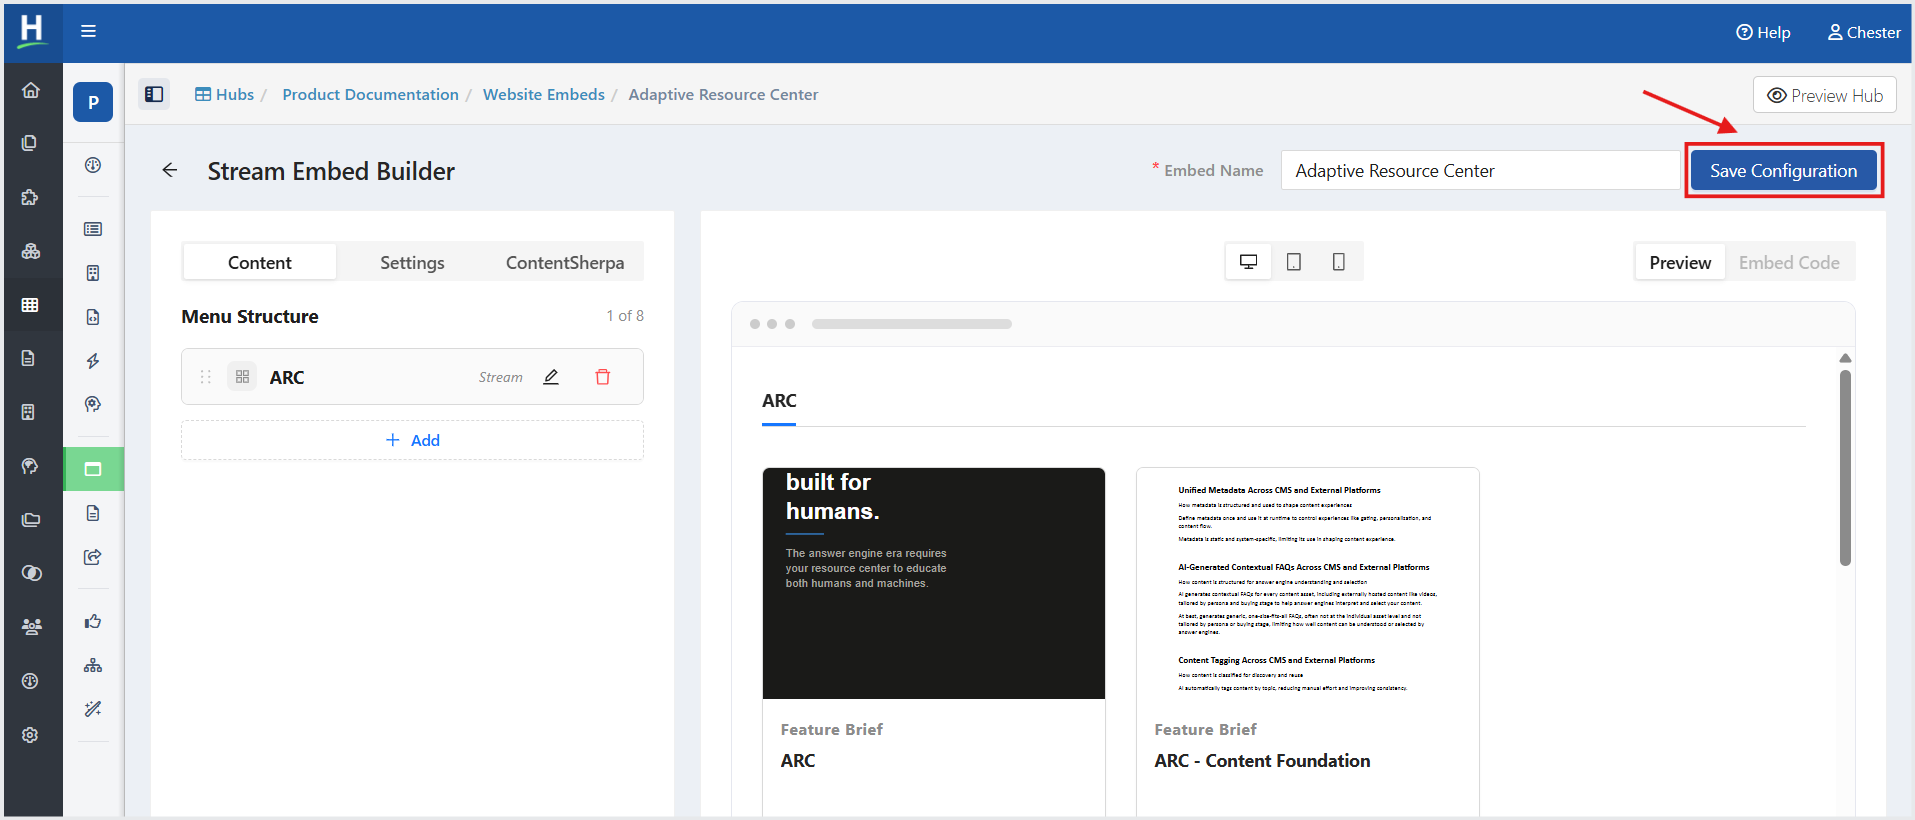
- Click Save Configuration.
Copy the Stream Embed Code
After configuring the Stream, you can copy the embed code and add it to the desired webpage or webpages.
- Click the Embed Code tab.
- Under Embed Type, select the required embed format:
- HTML — Use the HTML embed code to embed the Stream directly on a webpage.
- Tag — Use the embed tag format.
- Click Copy to copy the Stream embed code.
- Paste the copied code into the desired webpage or webpages where you want to display the Stream Tiles.
Important: You must install the Hushly Embed Tag along with the embed code.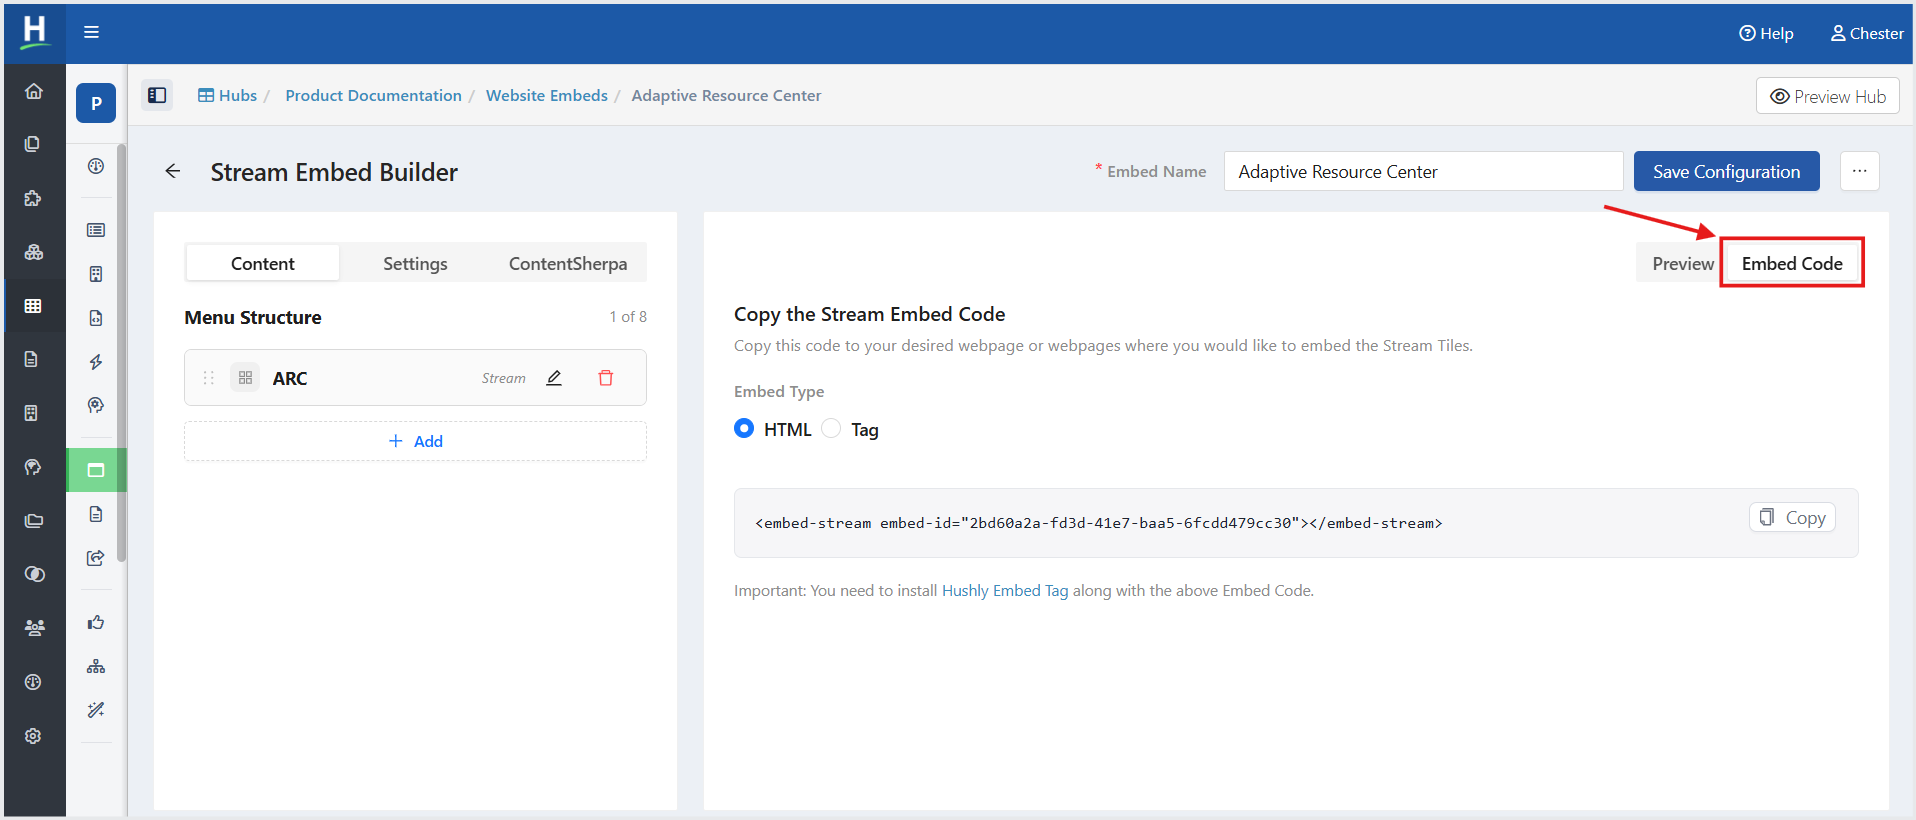
Stream Embed Settings
Use the Settings tab to customize the appearance, layout, navigation, and behavior of content displayed in the Hub.
Accent Color
The Accent Color determines the primary accent color used for the content. By default, the content uses the global accent color.
- To use a different accent color, click Override and select the desired color.
Menu Style
Choose how the content menu is displayed:
- Underline — Displays the selected menu item with an underline.
- Pill — Displays the selected menu item in a pill-shaped style.
Layout
Choose how content tiles are arranged:
- Grid — Displays content items in a grid.
- Carousel — Displays content items in a horizontal carousel.
Click Opens
Choose how a content item opens when clicked:
- New Window — Opens the content in a new browser window or tab.
Menu Alignment
Set the alignment of the content menu:
- Left
- Center
- Right
Content Tile Alignment
Set the alignment of content within each tile:
- Left
- Center
- Right
Tile Template
Choose the template used to display content tiles:
- Card — Displays content in a card-style layout.
- List — Displays content in a list-style layout.
- Poster — Displays content using a poster-style image layout.
Show CTAs
Use the Show CTAs toggle to control whether calls to action (CTAs) are displayed on content tiles.
- On — Displays CTAs.
- Off — Hides CTAs.
Enable Search
Use the Enable Search toggle to allow visitors to search the available content.
- On — Displays the search option.
- Off — Hides the search option.
Custom Styles
Use Custom Styles to add custom CSS styles to further customize the appearance of the content.
Note: Custom CSS can affect the appearance and behavior of the content. Ensure that any custom styles are valid before applying them.
Related Articles:
Was this article helpful?
That’s Great!
Thank you for your feedback
Sorry! We couldn't be helpful
Thank you for your feedback
Feedback sent
We appreciate your effort and will try to fix the article