An Embedded Form allows you to display a Hushly form directly within an asset on your website. This provides visitors with a seamless way to submit their information without leaving the webpage.
The form is added using an embed code, which you place in the HTML of the webpage where you want the form to appear. When the page loads, the embedded form is displayed in the specified location.
Use an embedded form to capture visitor information, support content engagement, and provide a convenient conversion experience within your existing website.
To embed a Form, follow the steps below:
- From the Left Navigation Menu, click Hubs. On the Hubs listing page, select the Hub you want to manage. From the Hub Menu, click DISTRIBUTION, and then click Website Embeds.
- On the Website Embeds listing page, click +New Embed.
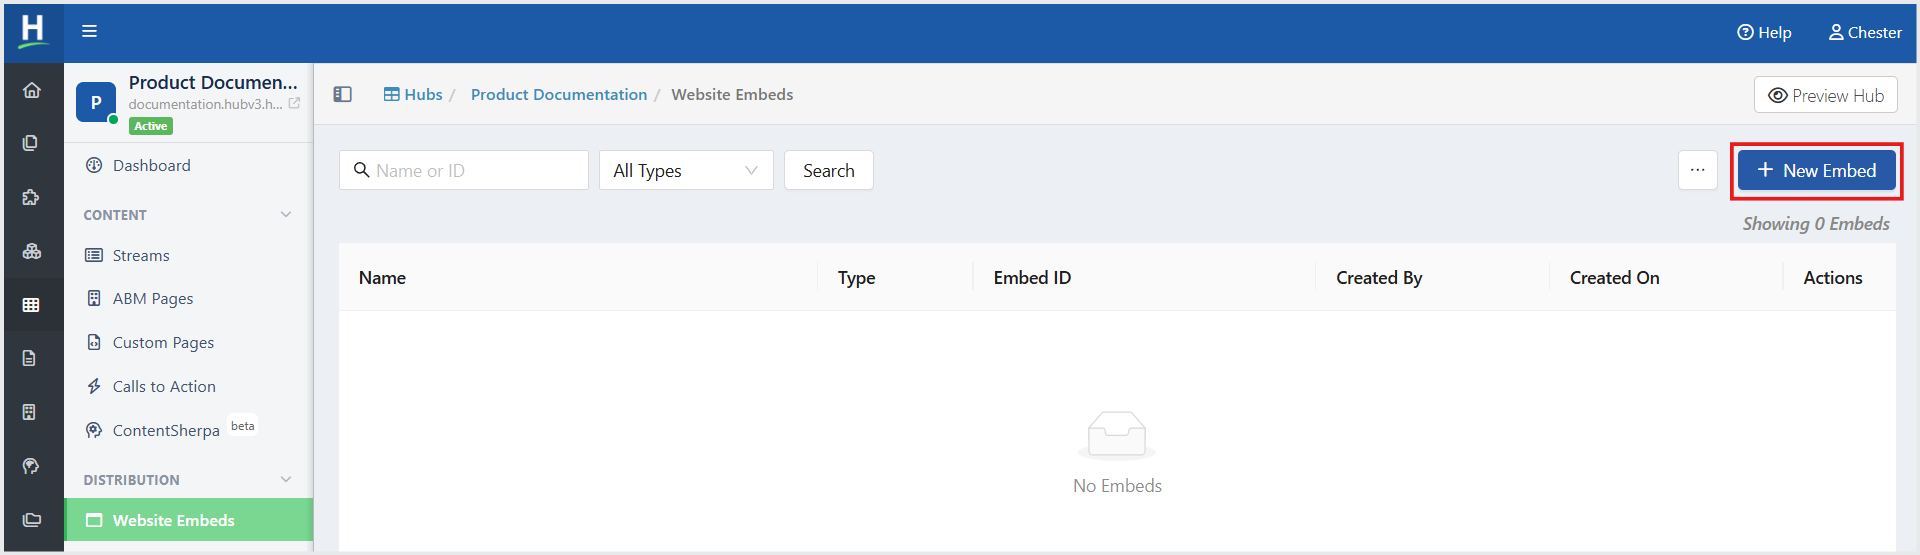
- In the New Embed window, select Form as the Type.
- In the Asset field, search for and select the asset on which you want to embed the form.
- In the Form field, search for and select the form you want to embed.
- In the Name field, enter a name for the Website Embed.
- Click Start Building. You are redirected to the Embed Builder, where you can begin designing and configuring your Form.
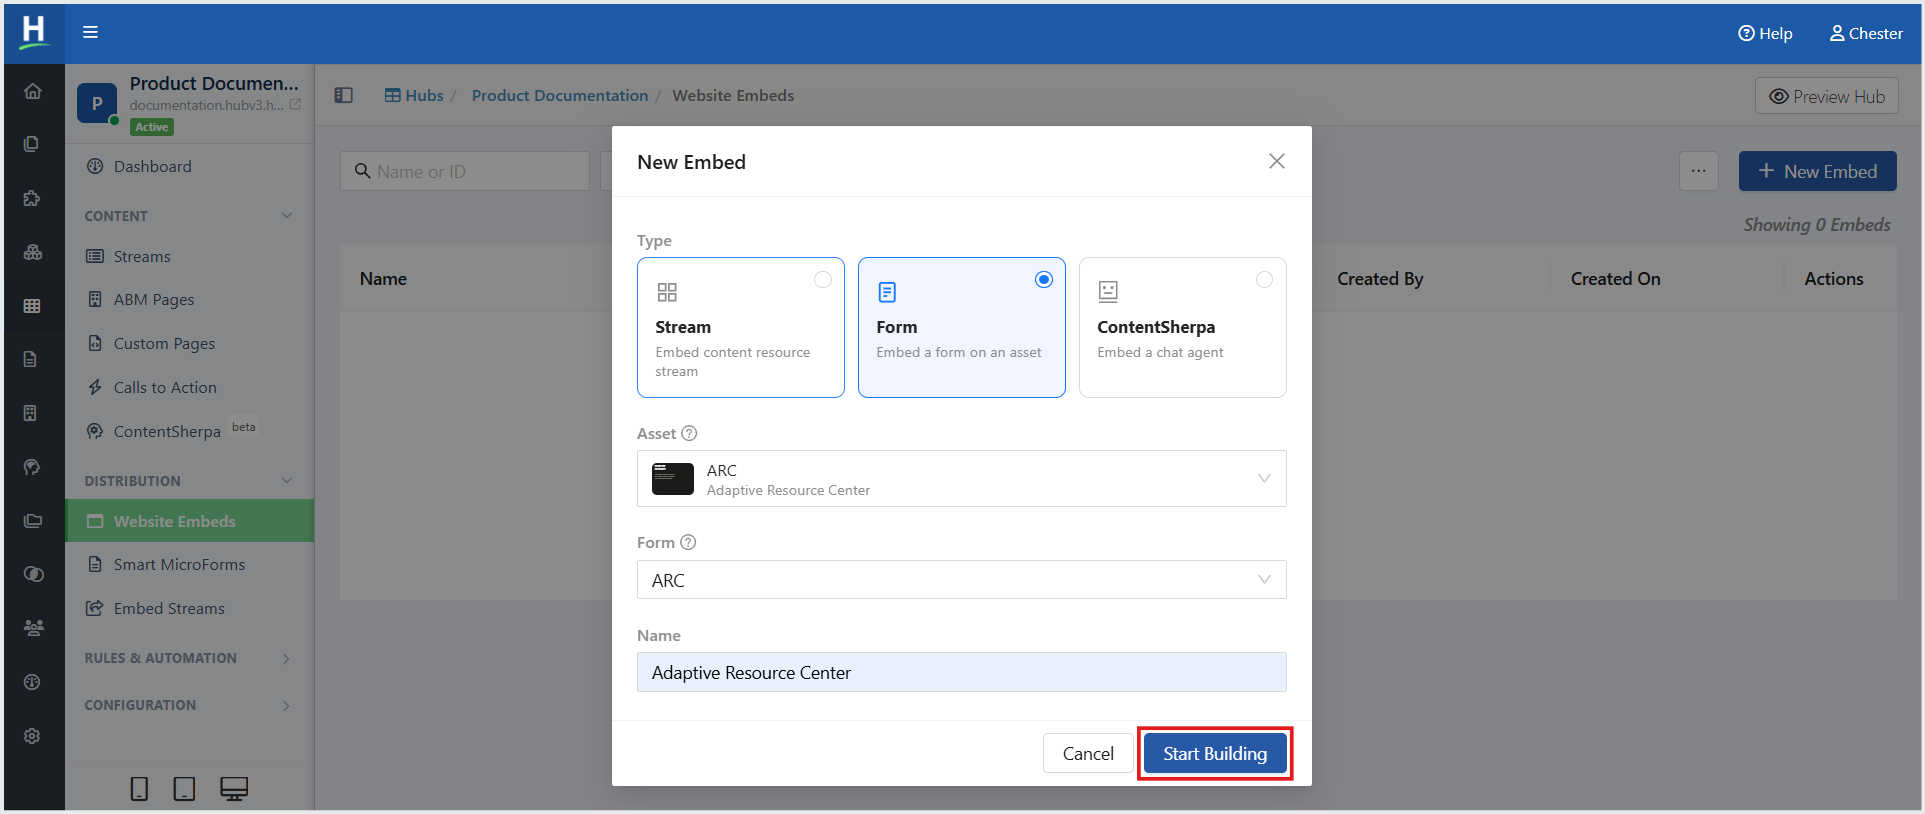
- Click Save Configuration.
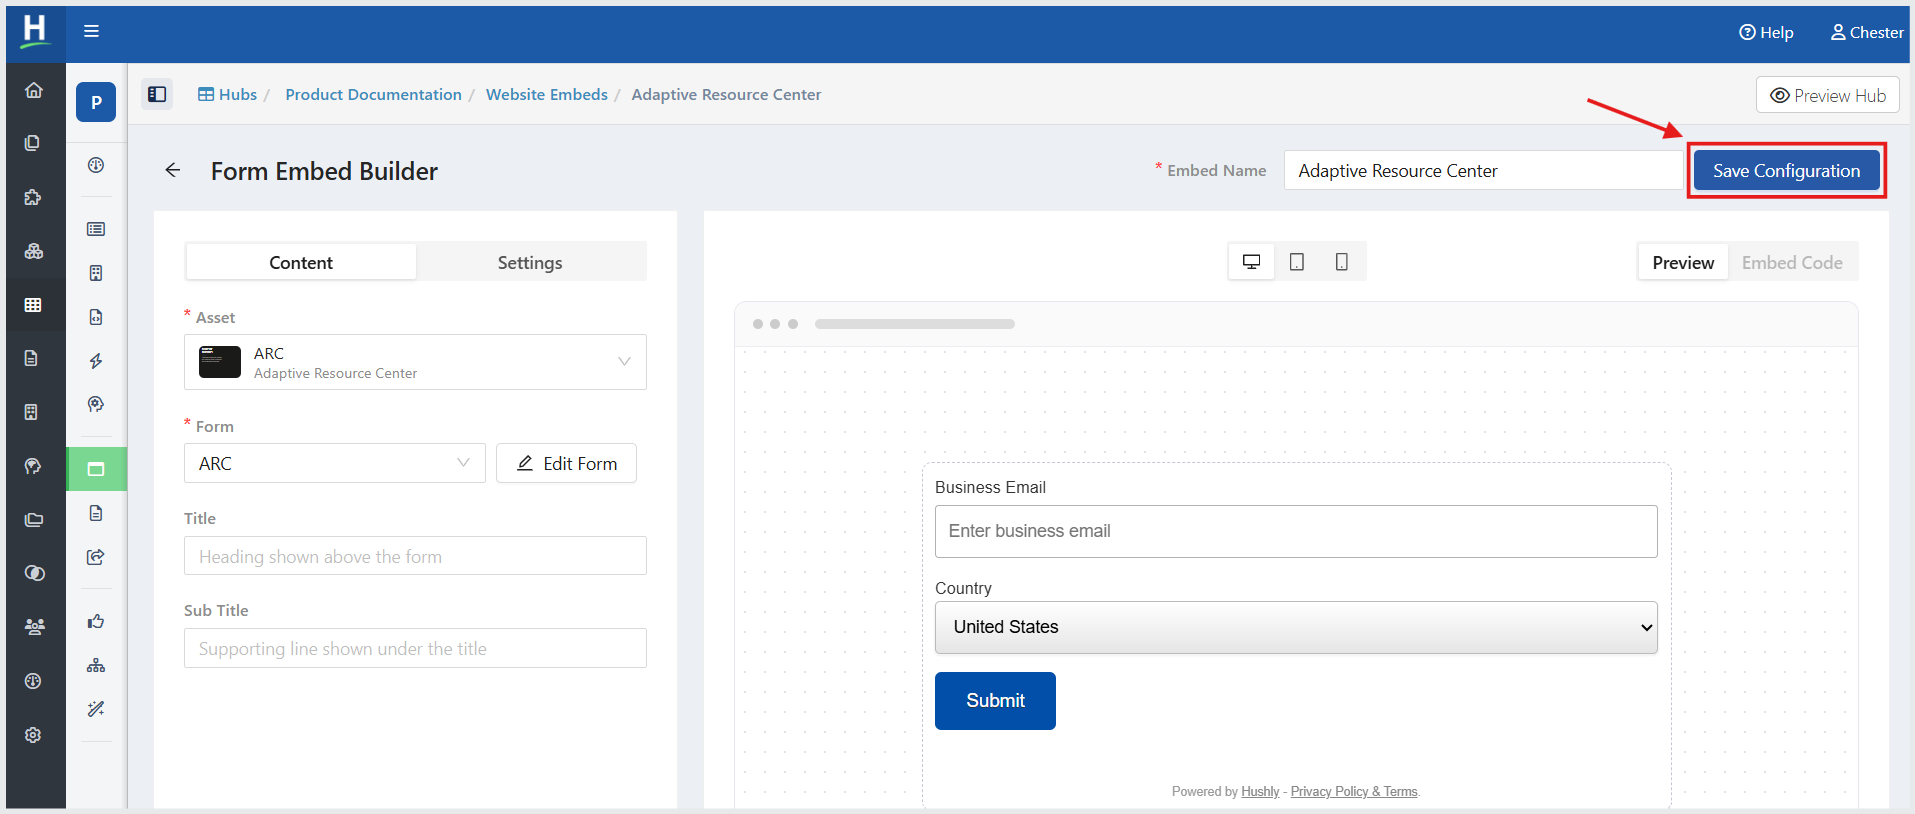
Copy the Form Embed Code
After configuring the Form, you can copy the embed code and add it to the desired webpage or webpages.
- Click the Embed Code tab.
- Under Embed Type, select the required embed format:
- HTML — Use the HTML embed code to embed the Form directly on a webpage.
- Tag — Use the embed tag format.
- Click Copy to copy the Form embed code.
- Paste the copied code into the desired webpage or webpages where you want to display the Form.
Important: You must install the Hushly Embed Tag along with the embed code.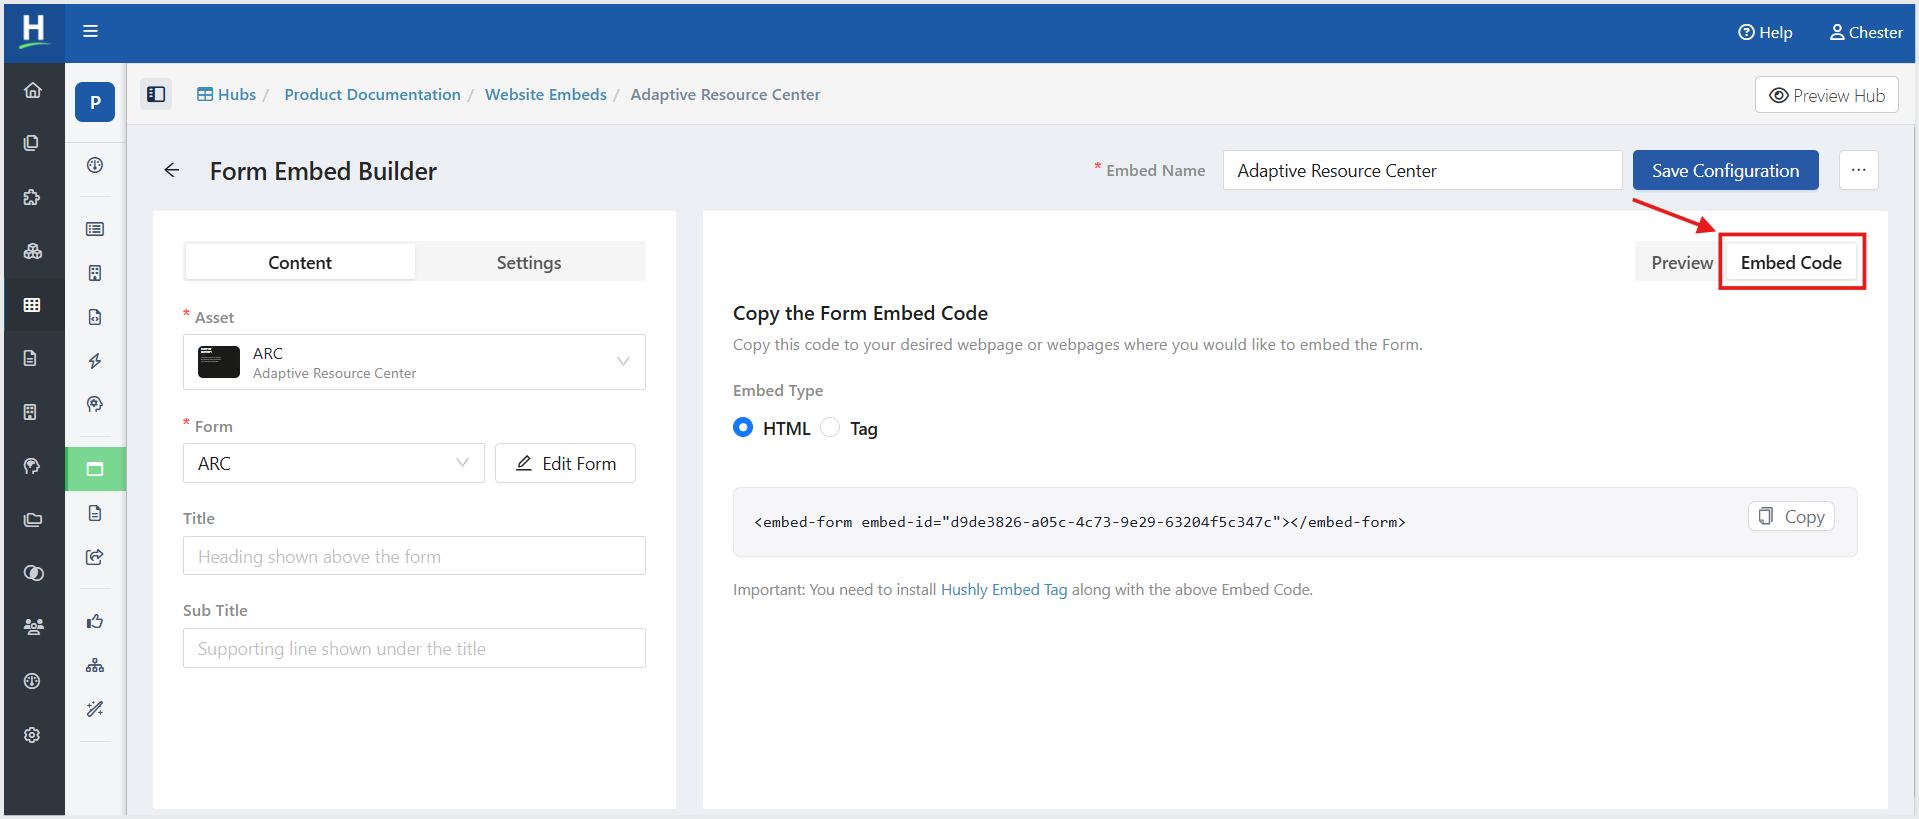
Form Embed Settings
Use the Settings tab to configure what happens after a visitor submits the form, email verification, language, and custom styling.
Post-Submission Action
Choose what happens after a visitor successfully submits the form:
- Display Default Thank You Message — Displays the default Thank You message.
- Display Custom Thank You Message — Displays a custom Thank You message that you configure.
- Redirect to Thank You Page — Redirects the visitor to a designated Thank You page.
Disable Email Verification
Use the Disable Email Verification toggle to control whether email verification is required.
- On — Disables email verification.
- Off — Requires email verification.
Language
Select the language in which the form is displayed.
- Click Select language.
- Select the desired language from the drop-down list.
Custom Styles
Use Custom Styles to add custom CSS to the form embed.
Enter the required CSS in the editor. The CSS is applied to the embed when it renders on the page.
Note: Custom CSS can affect the appearance and behavior of the form. Ensure that the CSS is valid before applying it.
Related Articles:
Was this article helpful?
That’s Great!
Thank you for your feedback
Sorry! We couldn't be helpful
Thank you for your feedback
Feedback sent
We appreciate your effort and will try to fix the article