The Settings section in PageSherpa allows users to manage their account preferences, company details, team configurations, billing information, and other essential platform controls. It serves as the central location for maintaining both personal and organizational setup details.
Within the Settings tab, the following sub-sections are available:
- Profile - Enables users to view and update their personal details, such as name, email address, and profile picture.
- Company - Displays and allows editing of company-related information, including company name, domain, and other relevant details.
- Plan & Billing - Provides access to subscription information, payment methods, and billing history for managing account plans.
- Team - Allows administrators to manage team members by adding, editing, or removing users, and assigning appropriate roles and permissions.
- Your Company AI Insights - Offers insights on your company based on the given AI Instructions. This knowledge is the basis of personalization in PageSherpa. AI generates account-focused content for the selected elements of the page for each Targeted Account based on these insights.
- PageSherpa Tag - The PageSherpa Tag is a lightweight script added to your website’s <head> section to enable personalized content and engagement tracking. Once installed, it automatically delivers tailored experiences to visitors without affecting your site’s performance.
Profile
- The Settings page opens with the Profile subsection selected by default. You can make changes to your Profile Picture and Name; however, the Email field is greyed out and cannot be edited.

Company
The Company section allows the account owner or administrator to view and modify key information related to the organization tied to the account.
- Click on the Company sub-section.
The Company Settings section opens, displaying:
- Company Name (editable)
- Let any user from @yourcompany.com join Toggle, which is enabled by default.
- Enabled: Anyone with an @xxxx.com email can join without an invitation.
- Disabled: Users must be invited manually.
- When you make any changes, the Save button becomes active.
Click Save to apply your changes.
Plan & Billing
The Plan & Billing section allows you to manage your subscription plan, track credit usage, and view your billing history.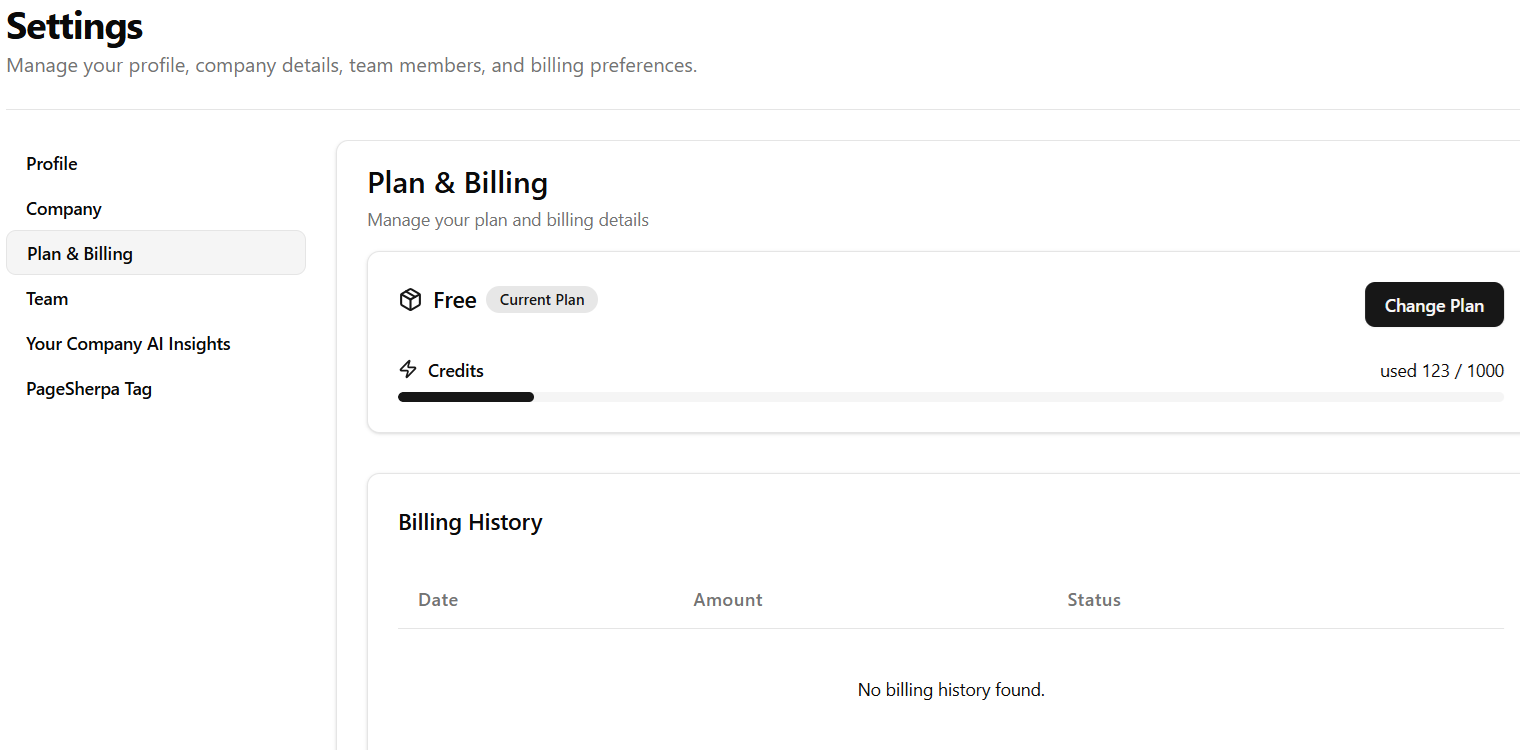
- Current Plan: Displays the plan your account is currently subscribed to. In this example, the active plan is Free.
- Change Plan Button: Click the Change Plan button to view and upgrade or downgrade your subscription. This opens the Change Plan page, where you can compare available plans (Starter, Enterprise, and Custom) and select the one that best fits your team’s needs.
- Credits: Shows the total number of credits available in your current plan and the number of credits used. For example, it may display used 123 / 1000 to indicate credit consumption.
- Billing History: Displays a list of all past transactions, including the date, amount, and status of each payment.
If there are no previous transactions, the message “No billing history found” appears. To learn more about the Plan & Billing, click here.
Team
The Team Management screen allows you to view, manage, and expand your team by inviting new members to collaborate. As the Team Owner or an Administrator, you have control over user roles and access. Team Members Section:
- Name: The user's name, e.g., John Doe (with initials JD).
Email: The user's email address, e.g., john.doe@acme.com.
Role: The user's permission level, e.g., Owner.
Joined: The date and time the user joined.
Invite User: A "Invite User" button is present in the top-right corner, which is explicitly for inviting new users to join the team
Pending Invitations Section:
- Email: The email address the invitation was sent to.
- Role: The role the invited user will have once they accept.
- Expires At: When the invitation link will no longer be valid. (Invitation link expires in 12 hours after the invite)
- Status: Indicates the current state of the invitation (for example, Active means the invitation link is still valid and can be used).
Inviting a New User
- Click on the Invite User button.
- The Invite User pop-up is displayed.
- Enter the Email and the Role (Admin/Editor).
Admin: Typically has full control over team settings, can invite/remove users, and manage all projects.
Editor: Can create, edit, and delete content/projects, but usually cannot manage team members or account-level settings.
- Click the Send Invitation Button.
- A success message is displayed: "Your invitation has been sent!".
- An invitation is sent to the user to join the team. Once the user clicks the Accept Invitation button, their name appears in the Team Members section.
Your Company AI Insights
The Name and Domain of the targeted accounts are displayed in the Your Company AI Insights section only when the Target Account page is personalized. The Your Company AI Insights section allows you to fine-tune how PageSherpa AI generates company insights. This feature helps personalize existing landing pages by automatically detecting the company’s domain, identifying the associated organization, and applying AI-generated insights to enhance page personalization.
Company Name: Displays the name of the company identified by PageSherpa AI.
Domain: Shows the associated company’s domain link.
Actions: Provides options to edit or delete company insights using the three-dot menu, allowing users to manage or configure company-specific settings.
- Under the Actions column, click the three-dot menu and select Edit to modify the company insights.

- The Edit Company pop-up appears, displaying the fields Company Name, Domain, and AI Instructions, along with the Cancel and Update buttons. The previously generated insights are also displayed. If you need to modify the insights, you can enter a new AI prompt and click Update to regenerate and save the changes.

- The Regenerate AI Insights? A pop-up is displayed with Cancel and Regenerate buttons. Click Regenerate.

- The AI Insight is generated, and the pop-up closes with a success message.

PageSherpa Tag
The PageSherpa Tag subsection provides the script tags required to enable personalization features on your website.
Copy and paste the PageSherpa Tag code snippet into the <head> section of your website, just before the closing </head> tag. Once installed, the tag automatically displays personalized content to visitors who access customized URLs. The tag is lightweight and does not affect your website’s performance. It only needs to be installed once to enable personalization across all pages.
You can also install the Anti Flicker Tag (Optional), which is an additional script that helps prevent page flickering when personalized content loads, ensuring a smooth user experience.
- Click the PageSherpa Tag in the Settings sub-section. The PageSherpa Tag and the Anti Flicker Tag are displayed.

- Copy and paste the code snippet into the <head> section of your website, just before the closing </head> tag. Once installed, the tag automatically displays personalized content to visitors accessing your customized URLs and tracks engagement by sending events to your Google Data Layer for analytics.

Related Topics:
Personalizing Pages using PageSherpa Extension
Personalizing Pages using PageSherpa Application
Was this article helpful?
That’s Great!
Thank you for your feedback
Sorry! We couldn't be helpful
Thank you for your feedback
Feedback sent
We appreciate your effort and will try to fix the article