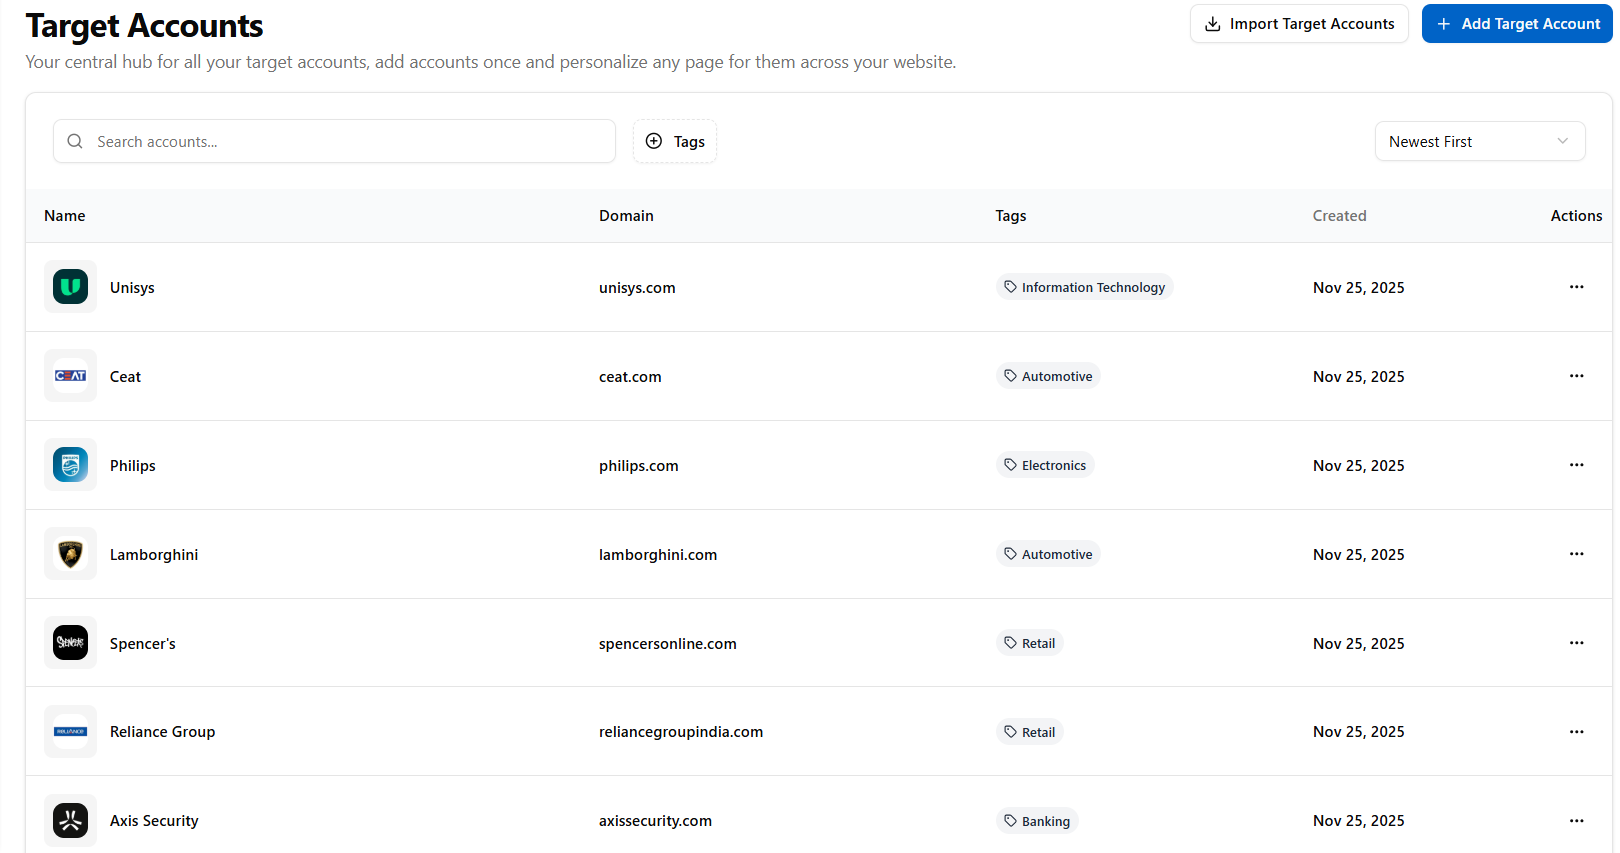
The Target Accounts section allows you to manage and organize company accounts within the platform. Each account entry displays the account name, associated domain, and the date it was created. You can search for target accounts using the search bar, filter them by creation date, or navigate through multiple pages of accounts.
These accounts serve as targeted accounts, helping you focus your personalization and engagement efforts more effectively. Accounts can be added in two ways: manually or imported in bulk, giving you flexibility in how you manage them.
Adding Accounts Manually
- From the Left Nav Menu, click the Target Accounts tab.

- The Target Accounts page displays the Import Target Accounts and Add Target Account buttons. Click Add Target Account.

- Create New Account Flow:
- When you click Add Target Account, a pop-up window appears with the following fields: Account Name, Domain, Description, and Tags.
- The Create Account button is initially disabled.
- Start typing the company name in the Account Name field.
- A pre-populated list of matching companies/domains will appear as suggestions.
- Select the desired company from the list, and its domain will be added automatically.
- Once a company is selected, the Create Account button becomes enabled.
- Enter a description (optional) in the Description Field.
- Select tags from the existing list or create new ones.
- Click Create Account to proceed with adding the new account.

- The newly added Account appears on the Target Accounts page. Each entry displays the account’s name and logo, associated domain, any applied tags, and the date the account was created.

- Click the Target Account to view the details.

- The Target Account details page is displayed, showing key information about the selected account, including its name, industry, website, and creation details. Beneath the account information, you can view a list of all Variations created for that specific Target Account.
Each variation displays:- The variation name.
- The associated URL
- The creator and creation date
- Its publication status (e.g., Published)
- The number of targets assigned

- Select a variation from the Target Account details page. The Variation Details page displays key information about the selected Variation, including its name, status, creator, and creation date. Below the header, you can view all Target Accounts linked to the variation, along with the module versions assigned to each account.
You can also use the available actions, Publish, Add Target Accounts, and AI Instructions, to manage and update the variation as needed.
Editing a Target Account
- To edit an account, click the three-dot menu under the Actions column and select Edit from the drop-down menu.

- In the Edit Target Account pop-up window, the Name, Domain, Tags, Description, and Update Account button (initially disabled) are displayed. Make the necessary changes, and then click the Update Account button

- A success message is displayed confirming that the account has been updated.

Deleting a Target Account
- To delete an account, click the three-dot menu under the Actions column and then select Delete from the drop-down menu.
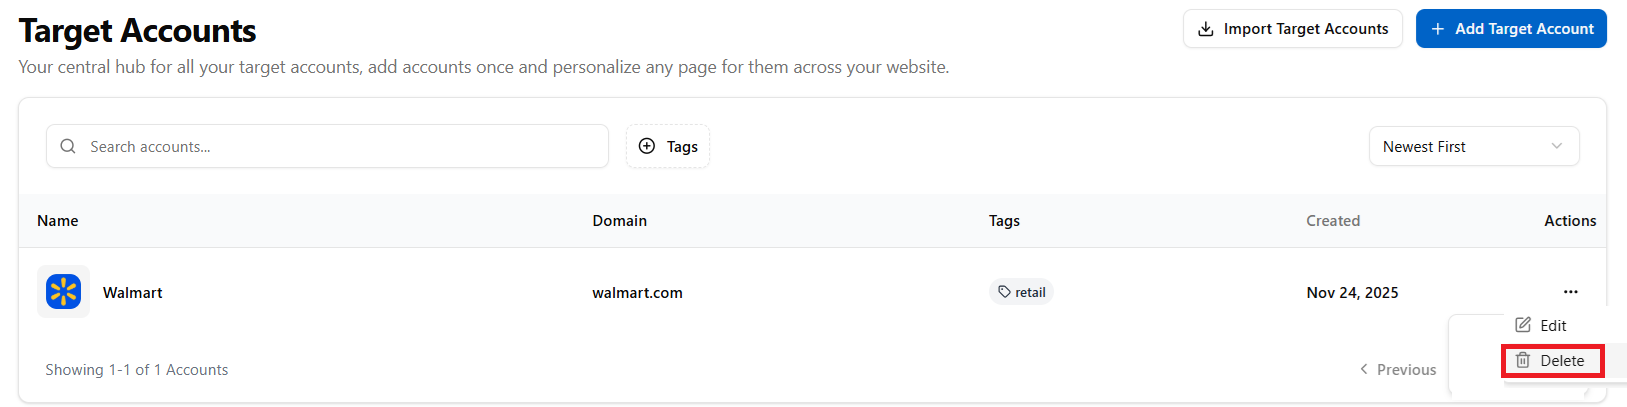
- A confirmation prompt appears with a Cancel and Delete button. Click Delete.

- A success message is displayed confirming that the account has been deleted.

- A confirmation prompt appears with a Cancel and Delete button. Click Delete.
Importing Target Accounts
- On the Target Accounts page, click the Import Target Accounts button.

- The Import Target Accounts pop-up window is displayed. Upload a CSV file to quickly add multiple accounts to the system. Simply drag and drop your file or browse to upload.

Import Flow:
Upload CSV.
Map Columns (Account Name, Domain, Tags, etc.) and click Preview Import.
Preview Data is imported(imported Accounts list), and click Import Target Accounts.
In the Import Complete section, the stats for the import (Total Records, Successfully Imported, Duplicate Skipped, and Failed to Import stats) are displayed.
Click Import More Target Accounts to continue importing or the Close button.
View imported accounts
Note: You can import as many accounts as you need.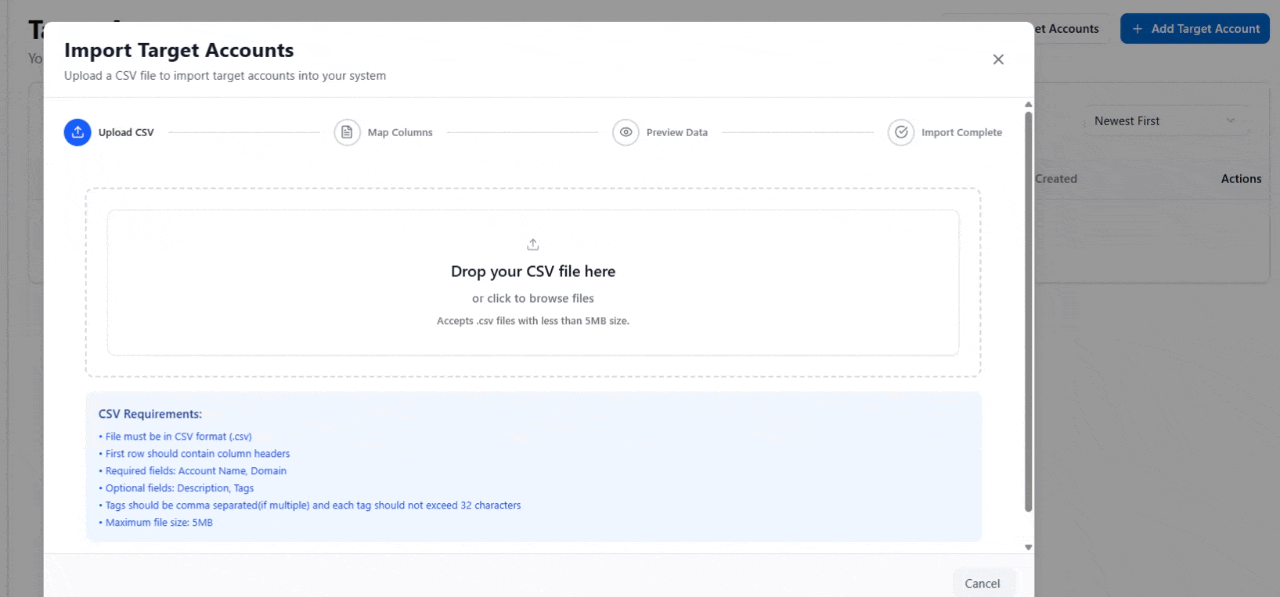
The imported Accounts are displayed in the Target Accounts page.
Searching Targeted Accounts
You can locate Targeted Accounts using the main search bar by entering the account name. In addition to name-based search, you can also refine your results using tag filters. By selecting one or more tags, the list is automatically narrowed down to display only the Targeted Accounts that match the chosen criteria. This makes it easier to find specific accounts based on categories, labels, or custom tag assignments.
- Enter the Target Account name in the main search bar, and the matching Target Account will be displayed.

- Select one or more Tags in the tag filter, and the Target Accounts associated with those tags will be displayed.
 Note: You can also filter by tags by selecting the imported name of the file as well.
Related Topics:
Personalizing Pages using PageSherpa Extension
Personalizing Pages using PageSherpa Application
Was this article helpful?
That’s Great!
Thank you for your feedback
Sorry! We couldn't be helpful
Thank you for your feedback
Feedback sent
We appreciate your effort and will try to fix the article