Domains
A domain is the web address used to host your Hushly Hubs or Experiences as part of your website.
A subdomain is an extension of your primary domain and is commonly used to organize content, such as product-specific resource centers, campaign pages, or ABM landing pages.
For example:
- Primary domain: mycompany.com
- Subdomain: resources.mycompany.com
Note: Your primary domain is established when a Hushly administrator creates your organization's account.
Domains and Hubs
You must create a domain before building a Hub.
Experiences, however, can run on any webpage without defining a specific domain. Configuring a domain or subdomain simply allows your content to appear as a seamless extension of your website, even though it is hosted on Hushly infrastructure.
Using a Subdomain with Hushly
Most customers create a dedicated subdomain, such as resources.mycompany.com, for their resource center. This is accomplished by creating a CNAME record in your Domain Name System (DNS).
A CNAME record acts as an alias. It tells browsers:
"When a visitor requests resources.mycompany.com, display that address in the browser while serving content from Hushly's hosting environment."
This approach provides a branded experience while Hushly manages the underlying hosting.
Setup Process
Follow these steps to configure your resource center:
Choose a Subdomain
Choose a subdomain that visitors will use to access your content, such as: resources.mycompany.com. This will be added to Hushly under Manage Domains.
Point the Subdomain to Hushly
Hushly hosts your resource center at: hubs.hushly.com
Create a DNS CNAME record that points your subdomain to hubs.hushly.com.
Example:
Once configured, visitors accessing resources.mycompany.com will be redirected to Hushly while remaining on your branded URL.
Configure SSL/TLS
Secure connections require SSL/TLS encryption. Although the industry standard is now TLS, the term SSL is still commonly used.
Choose one of the following options:
Hushly-Managed SSL (Recommended)
If you choose a Hushly-managed certificate:
- Hushly will provide a CNAME name and value pair.
- Add the additional DNS entry within 48 hours of receiving the information.
If you prefer to manage your own certificate:
- Generate an SSL certificate for your subdomain (for example, resources.mycompany.com).
- Send the certificate files to your Customer Success Manager or email them to support@hushly.com.
Adding a Domain
To add a domain, follow the steps below:
From the Left Navigation Menu, click Setup > Manage Domains.
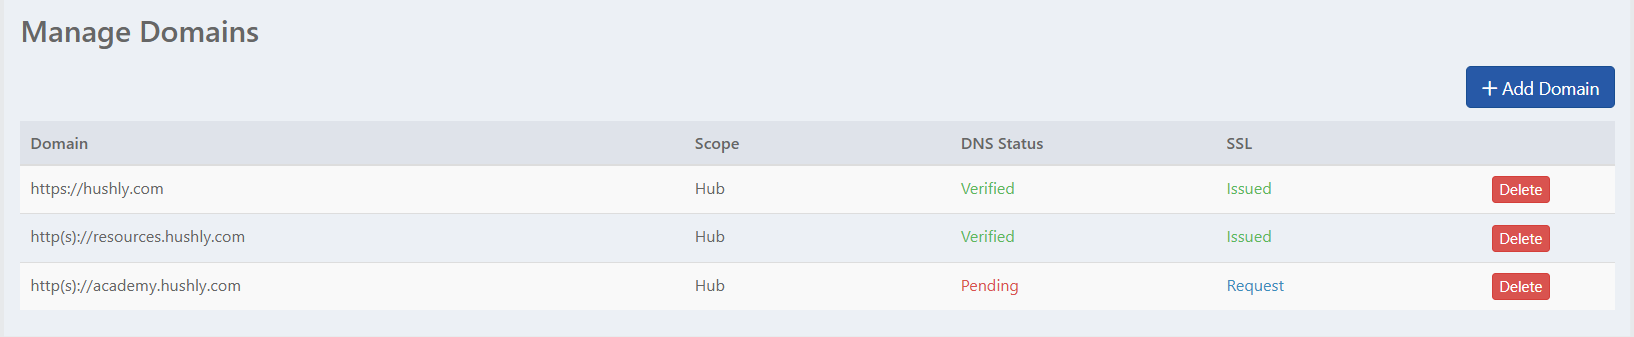
On the Manage Domains listing page, click +Add Domain.

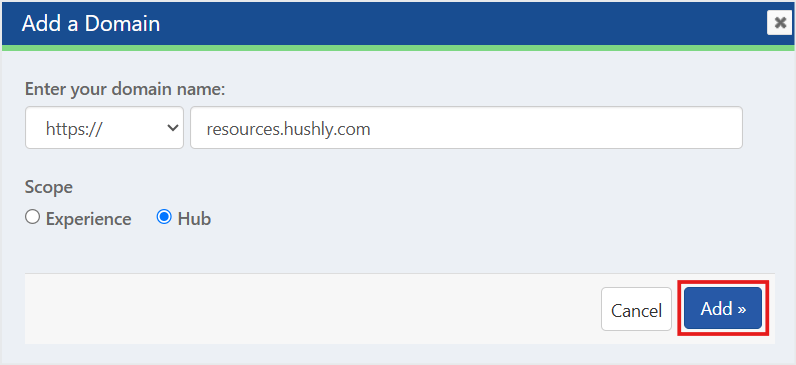
In the Add a Domain popup-window, click the picklist next to "Enter your domain name:", and select a protocol, https:// or http://.
The default domain protocol is http(s)://. If you do not select any protocol, the default domain protocol is assigned to the domain.
If the domain uses the http:// protocol but your configuration specifies https://, users accessing the resource center will encounter an error, and Experiences, Embedded Experiences, and Hubs will fail to load.
If the domain you’re trying to add is already in use by you or another Hushly customer, it cannot be added.
Enter the domain name.
Select the scope of the domain.
Select Experience to host Experiences in this domain.
Select Hub to host a Hub.
Note: A domain or subdomain hosts only one Hub. Therefore, to host multiple Hubs, create different domains or subdomains.
Click Add ».
The domain name is added to the list of domains on the Manage Domains page.
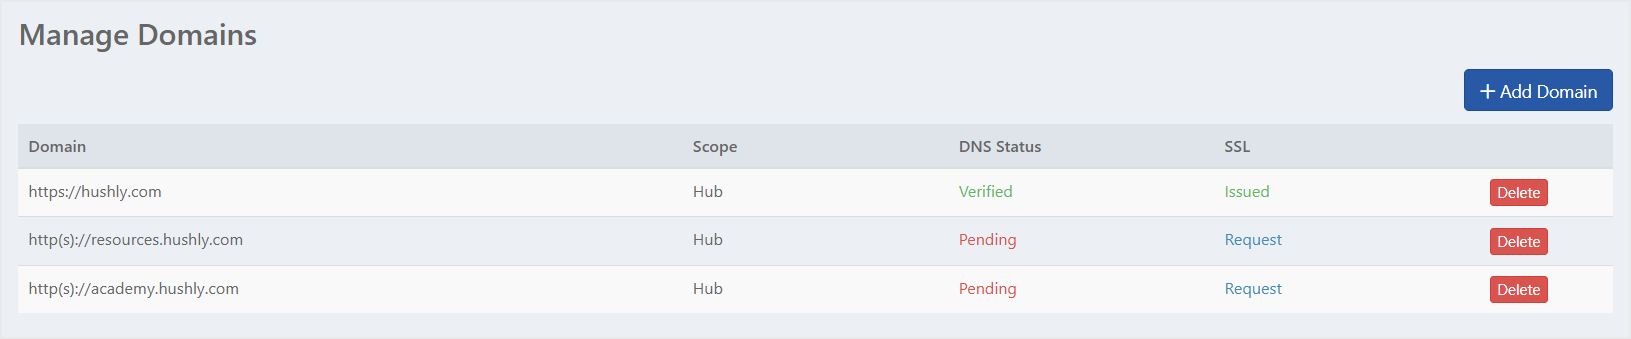
Note: An SSL Certificate is mandatory for https:// or http(s):// protocols, but not required for http:// protocol. A CNAME record is to be added to your DNS service provider.
Domains created with https:// or http(s):// protocol requires an SSL Certificate
- Click the Request link for the desired domain to request an SSL Certificate
- A Request is created in AWS, SSL Status reflects Pending
In the "Hub Domain DNS and SSL Configuration Instructions" popup-window, click Verify to get the status of your Request. Once the SSL is created in AWS, clicking Verify will update the SSL Status to Issued.
Note: Time Sensitive. When using the Hushly-managed SSL certificate, you must add another CNAME entry to your DNS server within 48 hours of receiving the CNAME name and value pair from Hushly.'
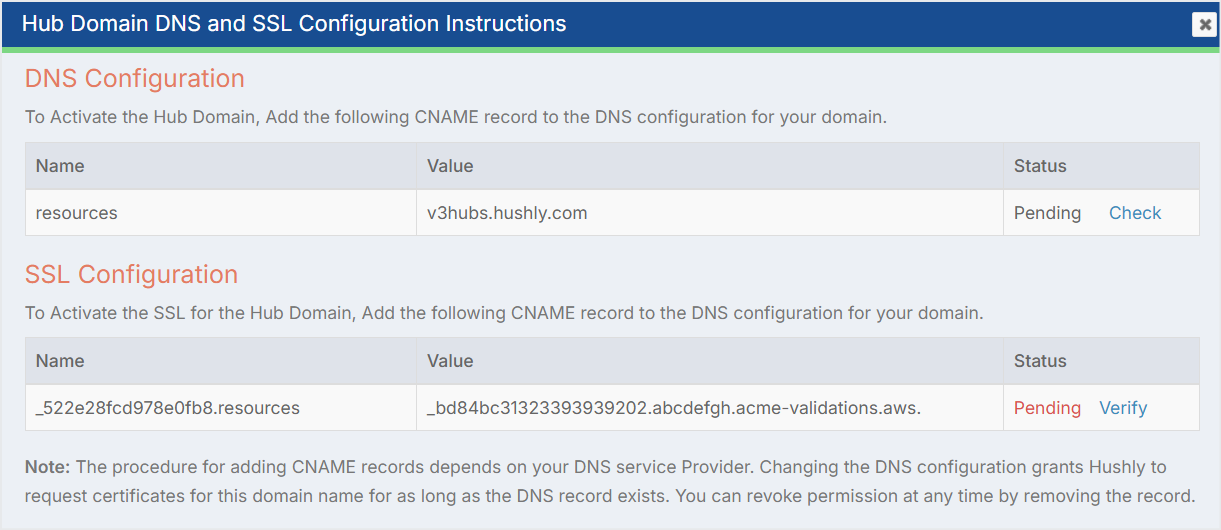
Adding the CNAME record in the DNS configuration for your domain.
- Click the Pending link for the desired domain to check the DNS Status
- Add the CNAME to your Domain with the values provided and save.
- Example: Host: 'resources' points to: 'hubs.hushly.com' or 'v3hubs.hushly.com'
- Click Check, and the DNS Status will be updated — Verified will be shown.
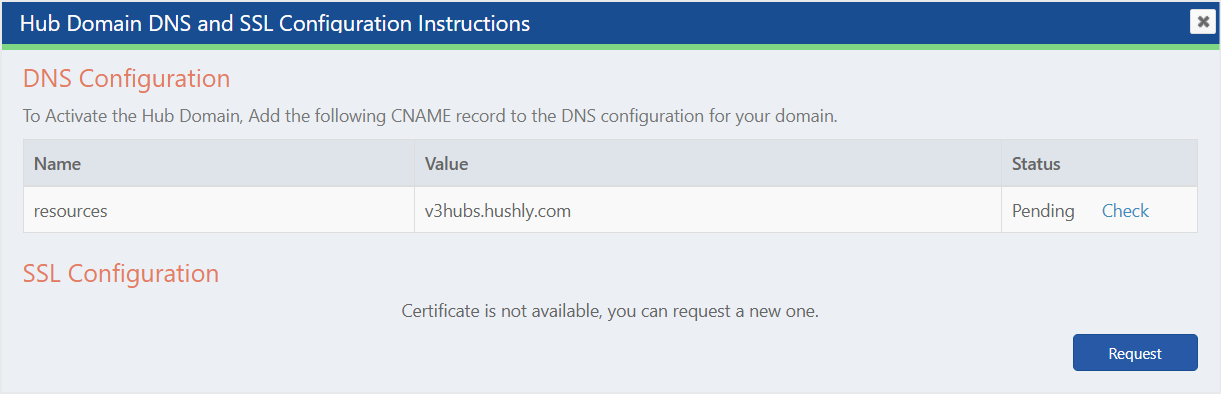
The domain is now SSL-certified with a valid DNS configuration and is ready to be used by a Hub.
Email support@hushly.com to notify the team that the above steps have been completed, so the Hub can receive final QA and be launched. Reach out if you have any questions or problems.
Was this article helpful?
That’s Great!
Thank you for your feedback
Sorry! We couldn't be helpful
Thank you for your feedback
Feedback sent
We appreciate your effort and will try to fix the article