Once you create an Incentive Program, go to Web Experience to design the Incentive Program Widget.
- From the Left Nav Menu, click Web Personalization > Web Experience.

- On the Web Experience page, click on an existing Web Experience on which you want the Incentive Program. Click here to learn how to create a Web Experience.
- Click on the Variation name.

- From the Preview Section, select a Page Block and Element where you want the Incentive Form to appear. Click on the Widgets Tab > Incentive Programs.

- Content: Enter a Name for the Incentive Program and select a Layout, either Pop-up or Embed.

- Select the Incentive Program that you created from the drop-down. Learn how to create an Incentive Program here.

- Select a Template.

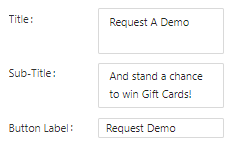
- Design the Template by adding a Title, Subtitle, and Button Label.
- Insert Media (optional).

- Style: Customize the Template color from the Style drop-down.

- Container Settings: Add Height and Width.

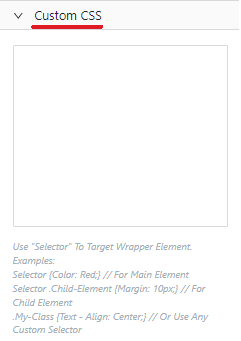
- Custom CSS: You can add Custom CSS. Click here for more information about CSS Declarations.
- Click Save.

Related Articles:
Incentive Programs
Creating an Incentive Program
Account Reps For Incentive Programs
Pause/Resume/End an Incentive Program
Incentive Program - Changing Registrant Status
Editing an Incentive Program
Deleting an Incentive Program
Incentive Programs - Metrics
Was this article helpful?
That’s Great!
Thank you for your feedback
Sorry! We couldn't be helpful
Thank you for your feedback
Feedback sent
We appreciate your effort and will try to fix the article