Forms are used to capture the lead information. Hushly allows you to configure the Forms used in Hubs, Assets, and Experiences. The leads that come in through the Standard Form go through the Hushly Lead Enrichment process.
To create a Standard Form, follow the steps below:
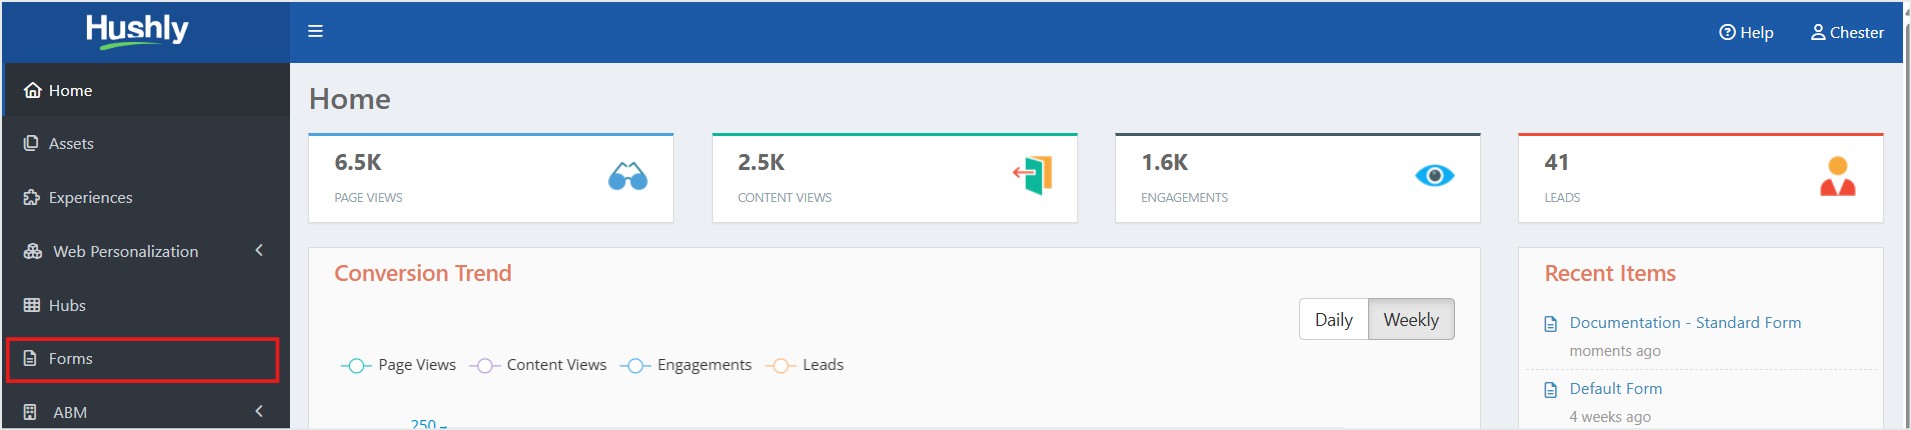
- From the Left Navigation Menu, click Forms.
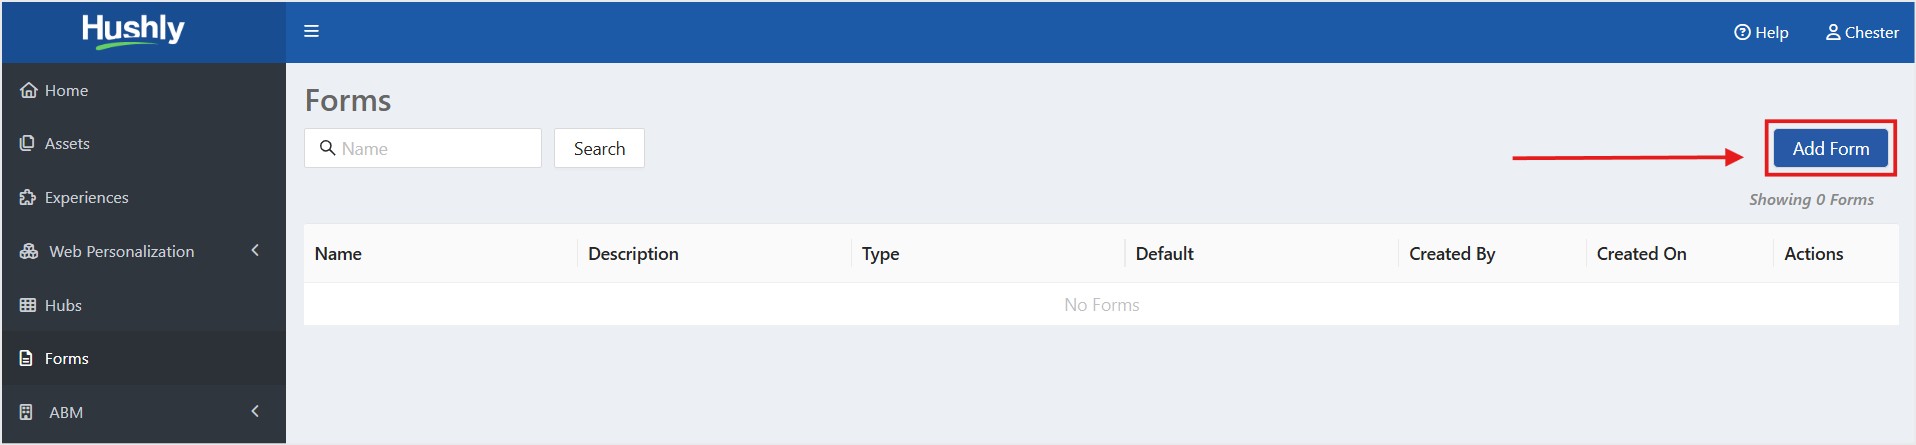
- On the Forms page, click Add Form.
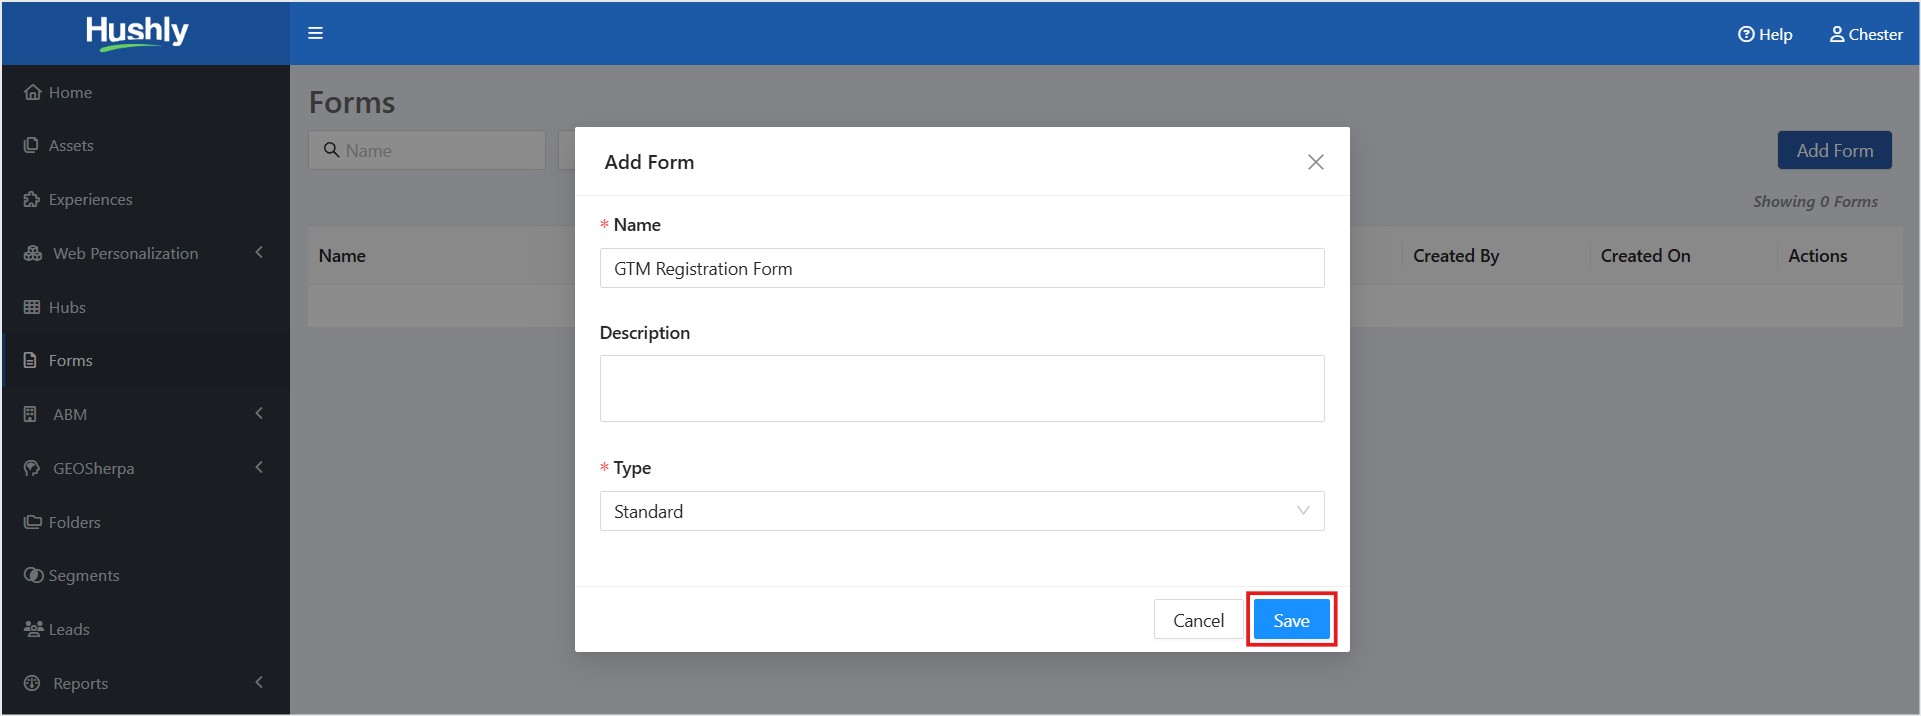
- In the Add Form pop-up window, enter the Form Name, and optionally, enter a Description. From the Type drop-down, select Standard. Click Save.
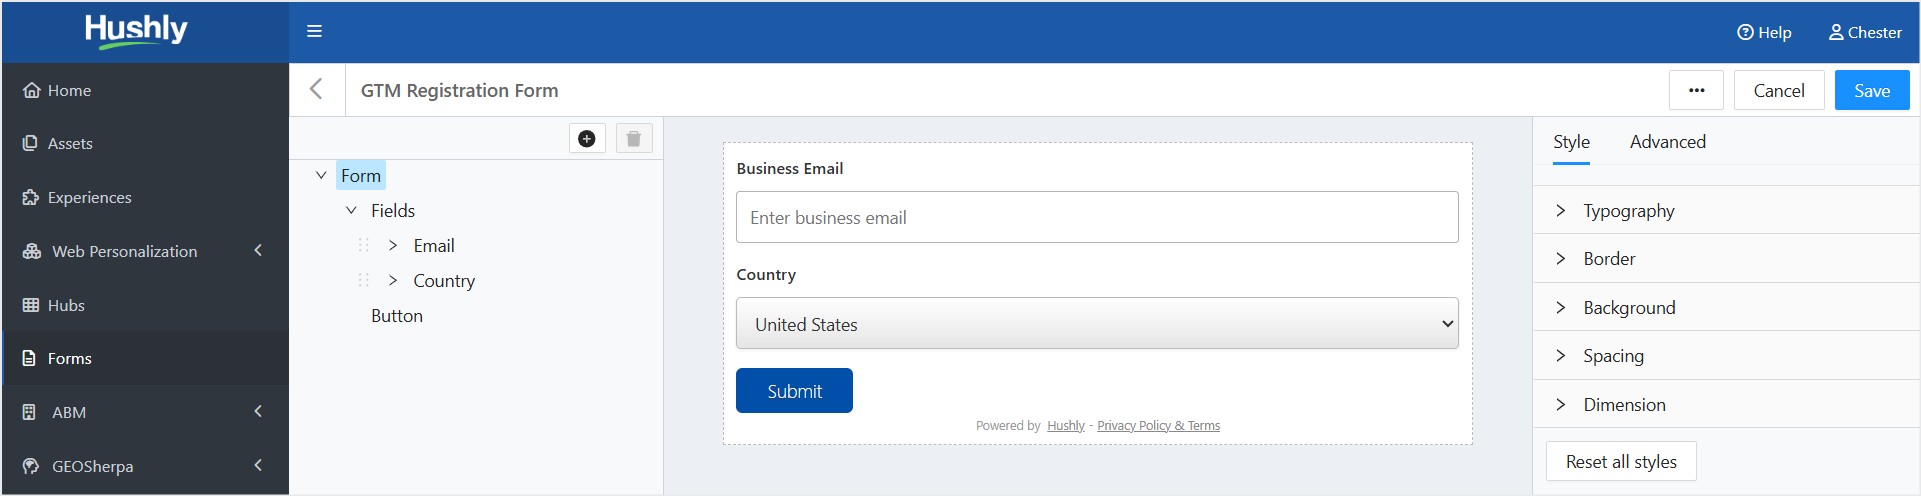
- After you click Save, the form is displayed with the Standard fields - Email and Country.
- To add Custom fields to the form, click the + icon (Add Element) and select the field.
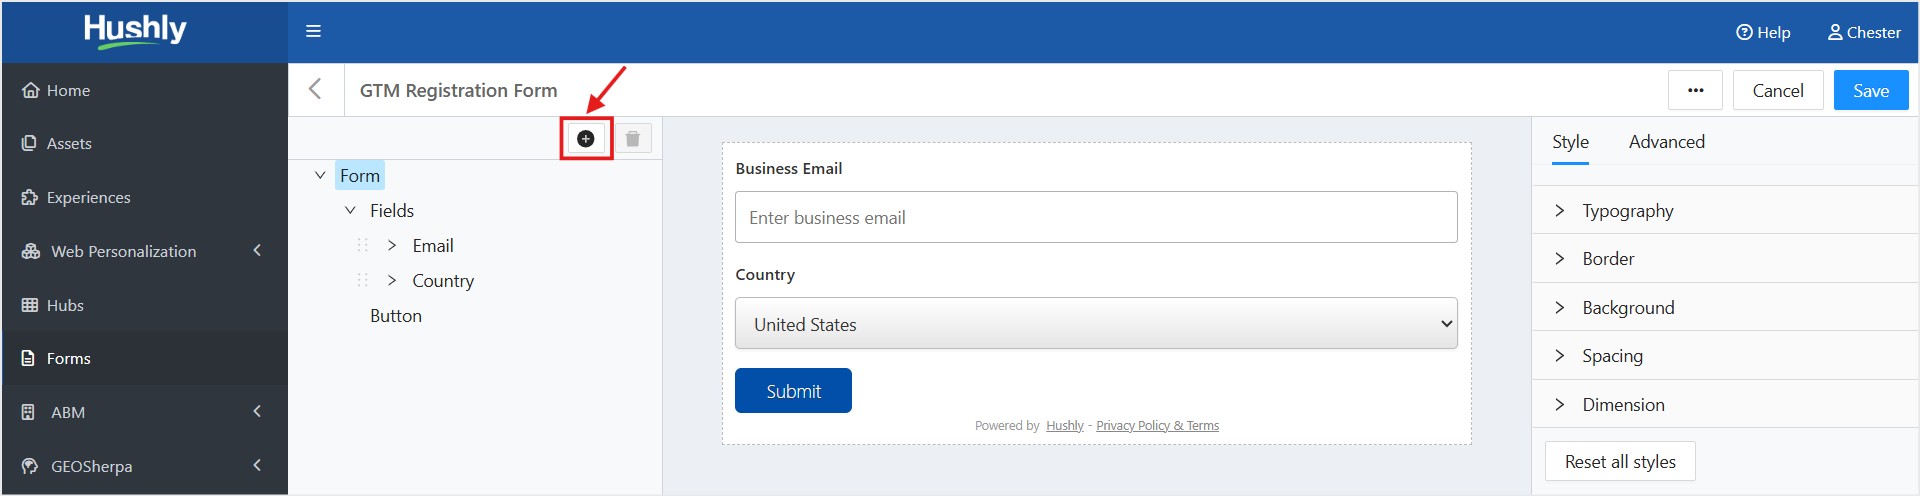 Note: Configure the custom fields at the Setup > Field Management > Lead Fields level and it will be displayed in the add (+ icon) drop-down.
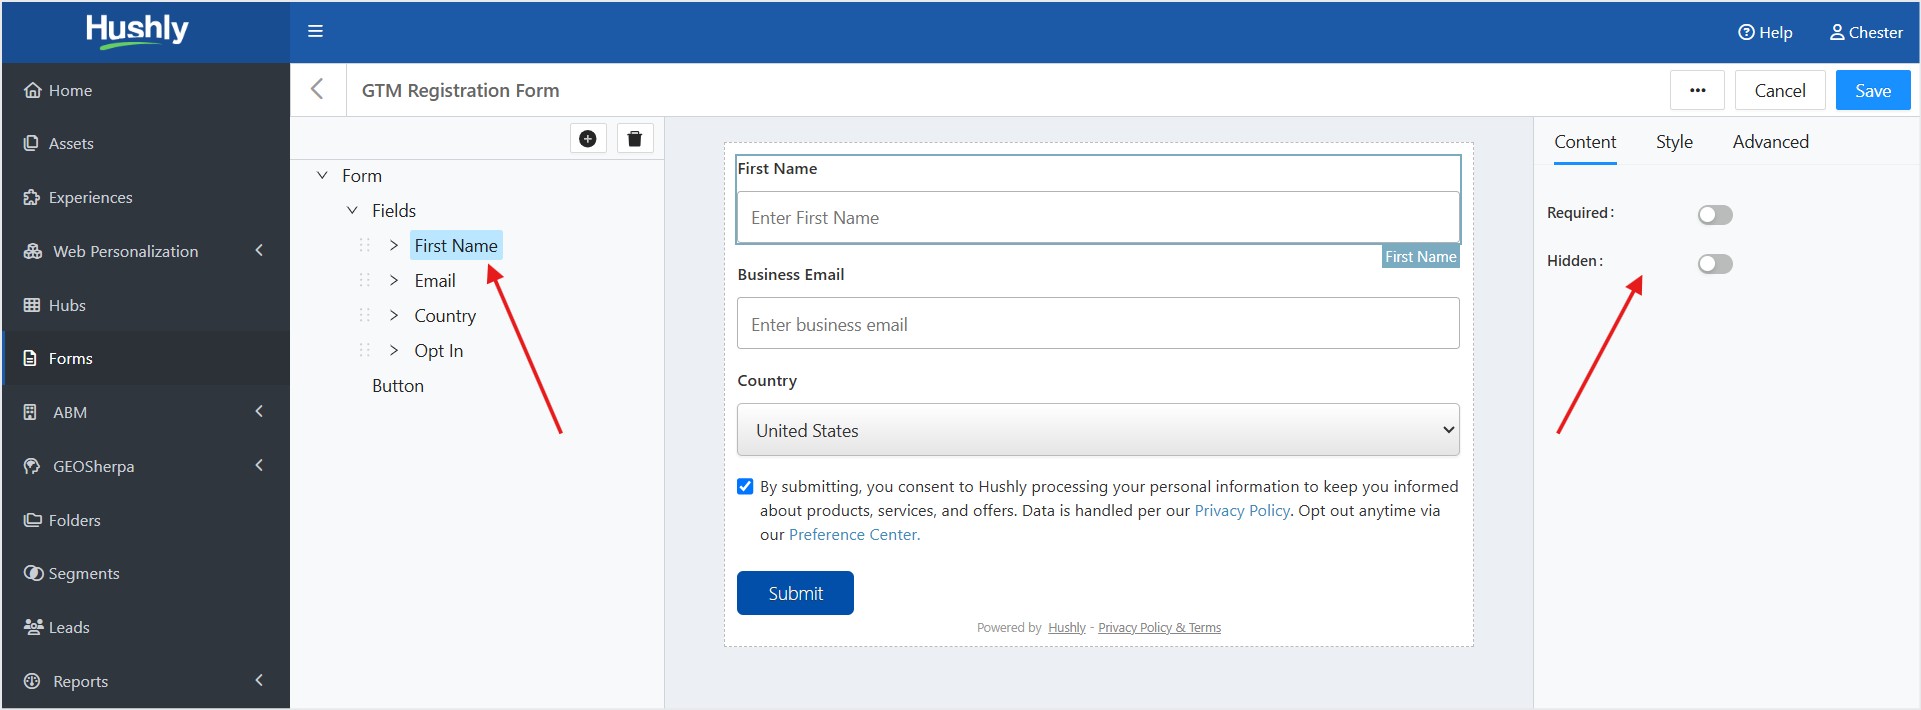
 - Select an Element from the Element column and configure the Element in the configuration column on the right side.
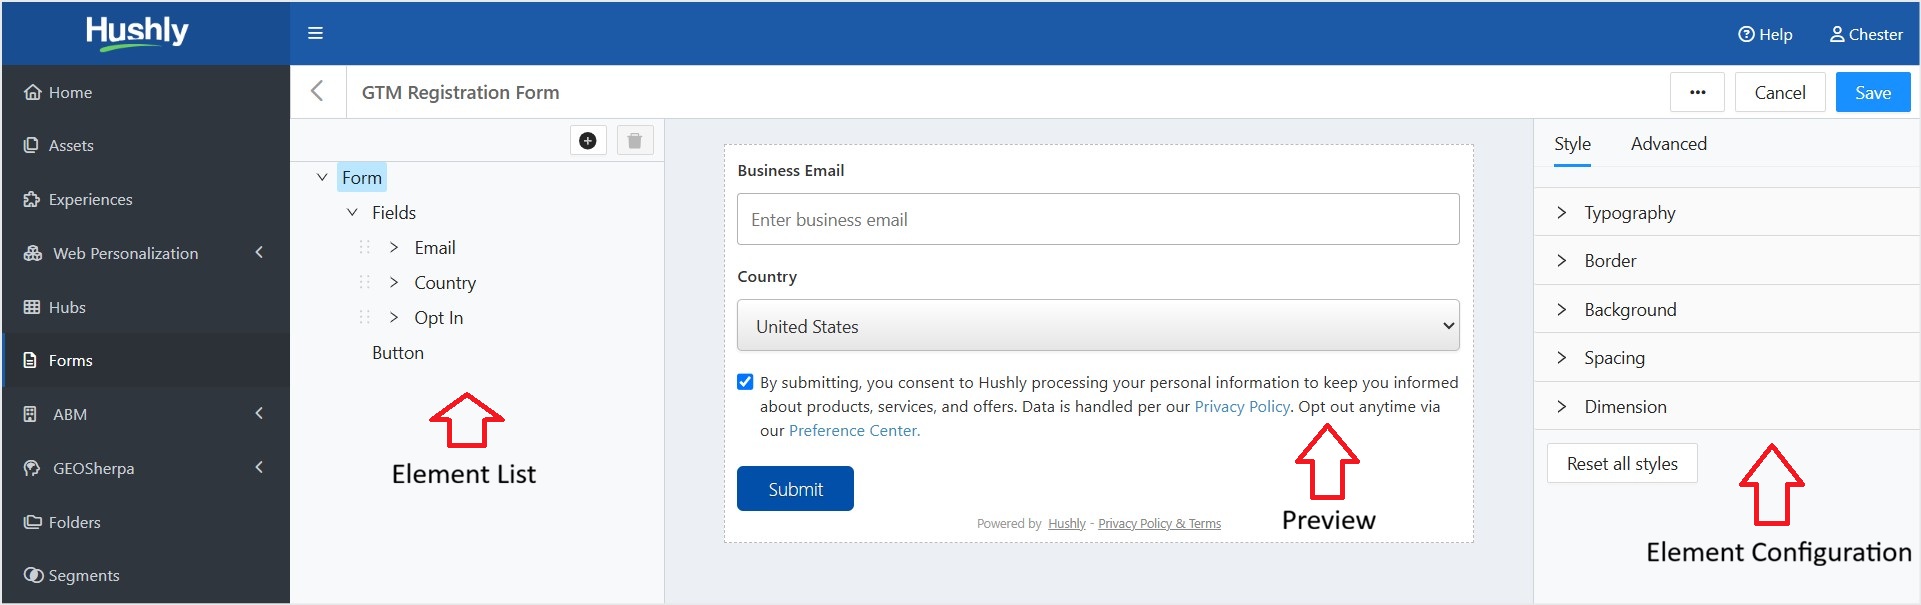 The Form is divided into the following 3 columns -
- List of Elements - By default, the standard fields are displayed in the Element column. These fields cannot be deleted, however, you can add or delete as many custom fields in the Element column.
- Preview - This column displays the layout of the form as a Preview. The changes made to the Element and Configuration columns are displayed here.
- Element Configuration - Select an Element from the left and you can change the label name or the placeholder of the fields in the configuration column.
- Standard Fields:
- By default, the required Toggle is set to True and disabled.
- You can make changes to the label name and placeholder for the Email Field.
- You can make changes only to the label name of the Country Field.
- Custom Fields:
- The Required Toggle is enabled, you can toggle it to True/False.
- The Hidden Toggle is enabled, you can toggle it to True/False.
- You can make changes to the label name and the placeholder for any of the custom fields.
- Standard Fields:
- List of Elements - By default, the standard fields are displayed in the Element column. These fields cannot be deleted, however, you can add or delete as many custom fields in the Element column.
- To configure an Element - Select the Element on the left side and configure it on the right side.
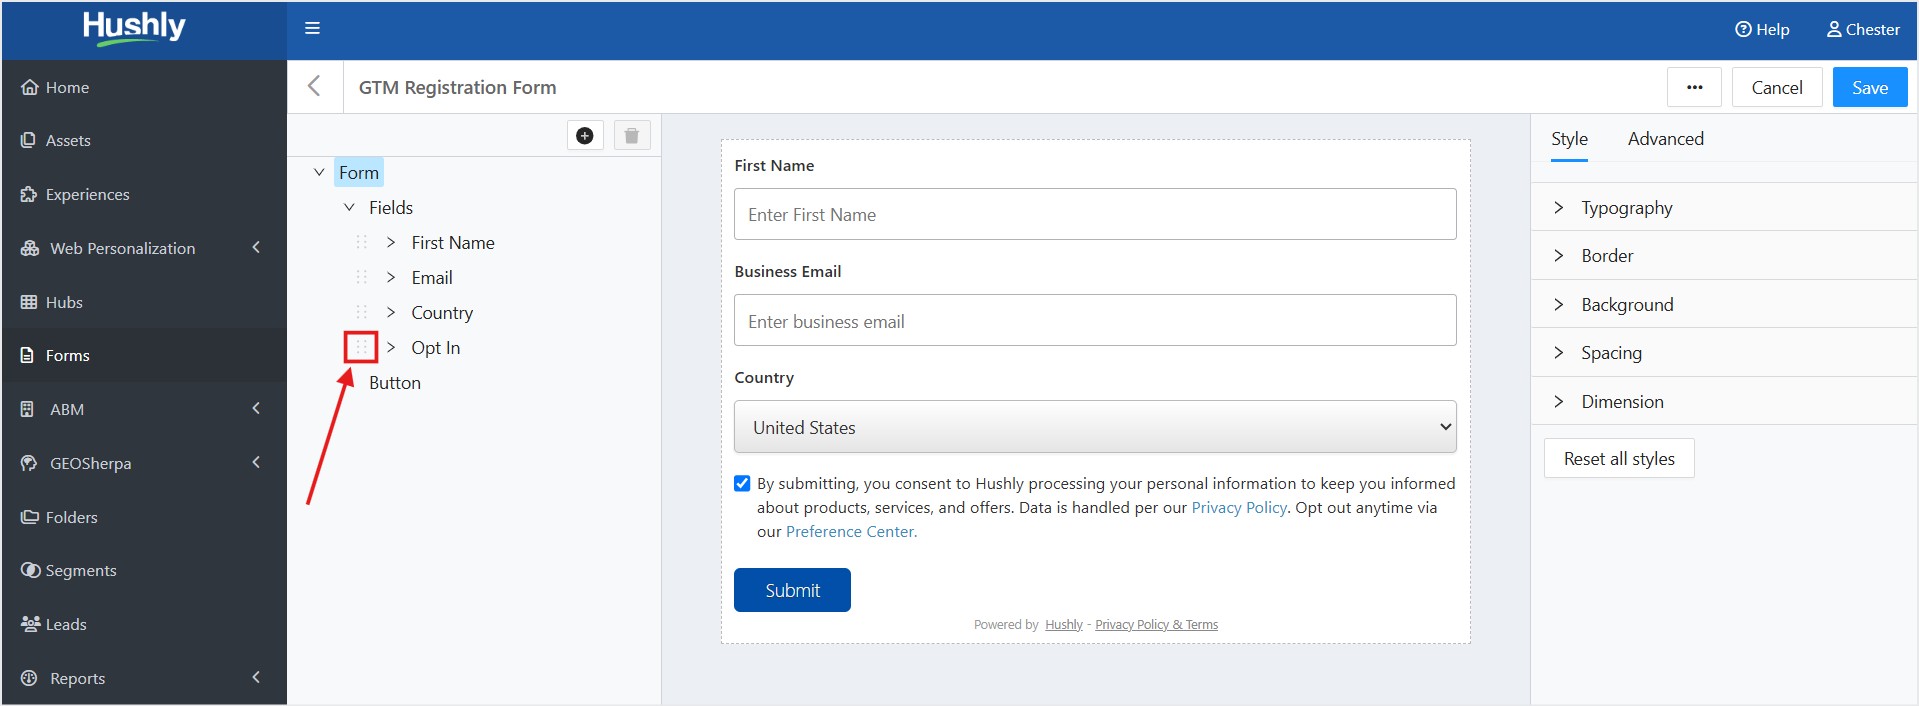
- You can drag and drop the Elements in the Element column to fit the order you like to view.
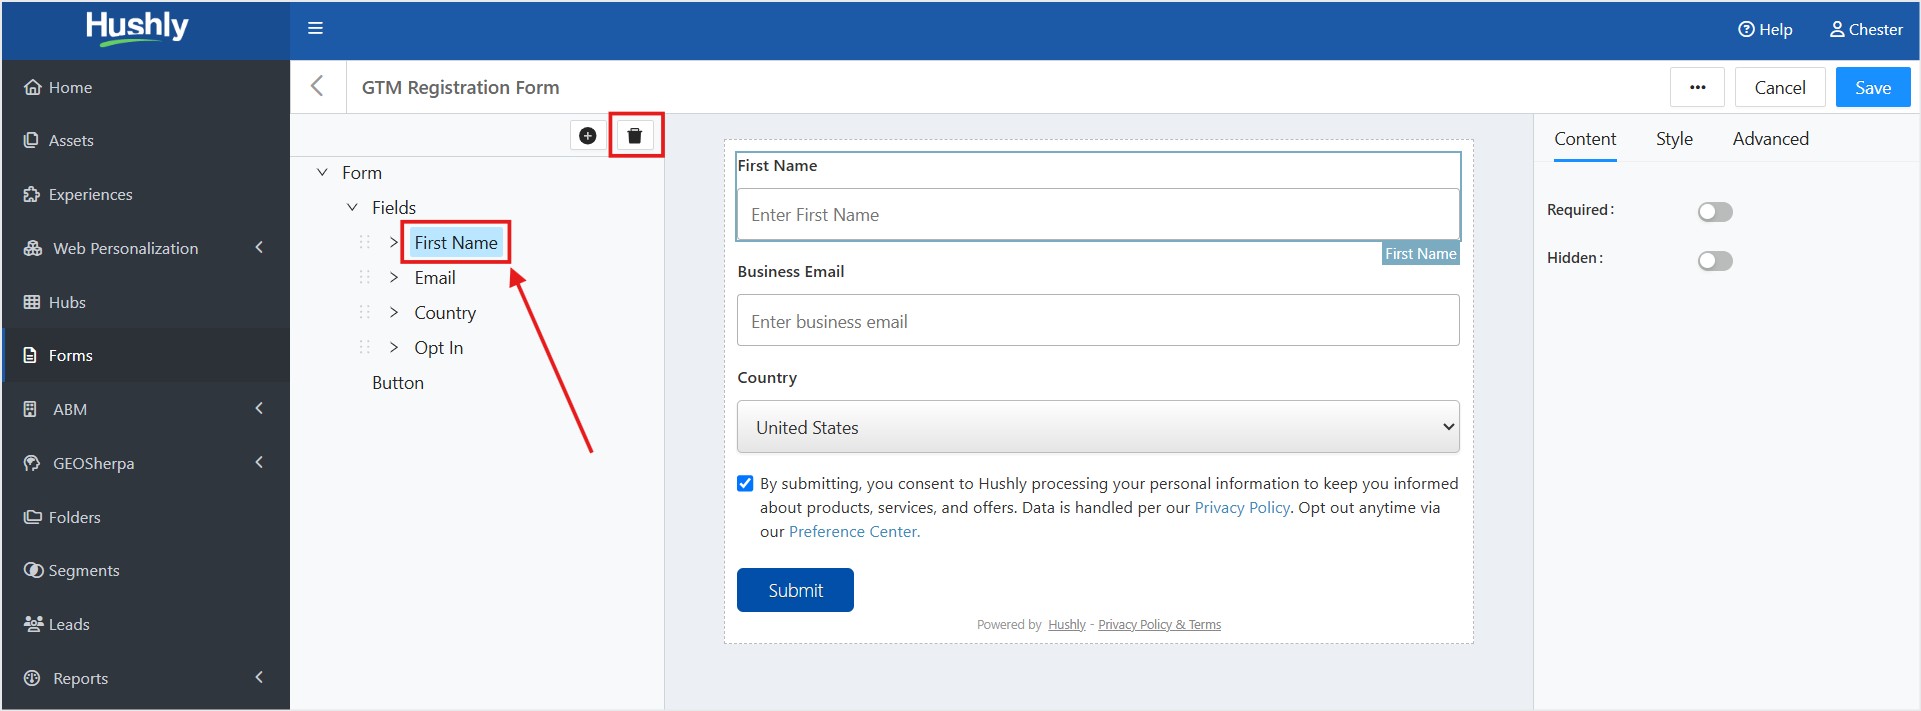
- Select the custom field and click the Delete icon to delete it from the list of Elements.
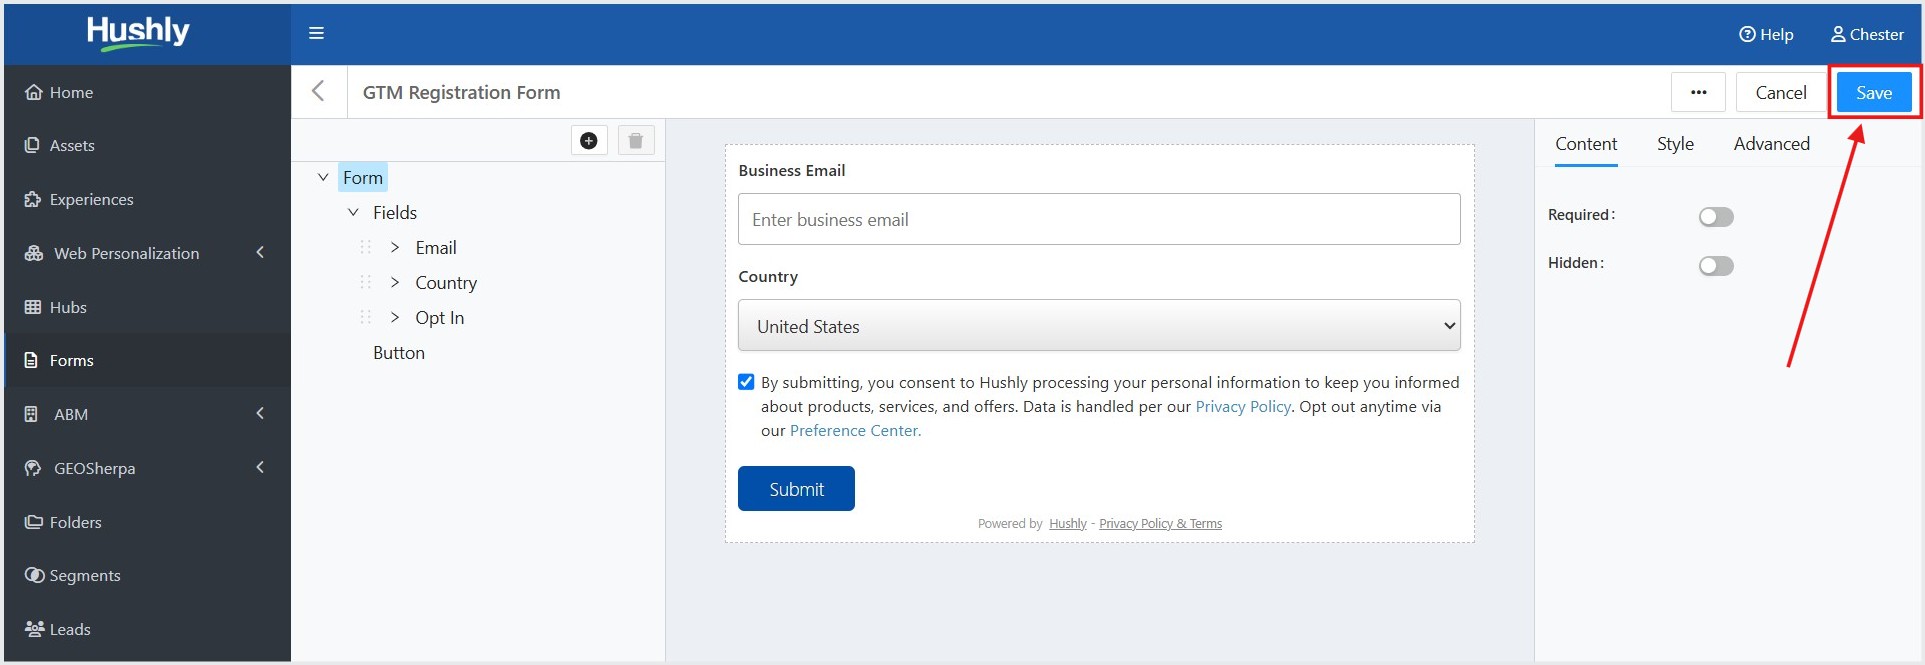
- Click Save to apply the changes to the form to be viewed at run time.
 Note: The saved form is displayed on the forms listing page.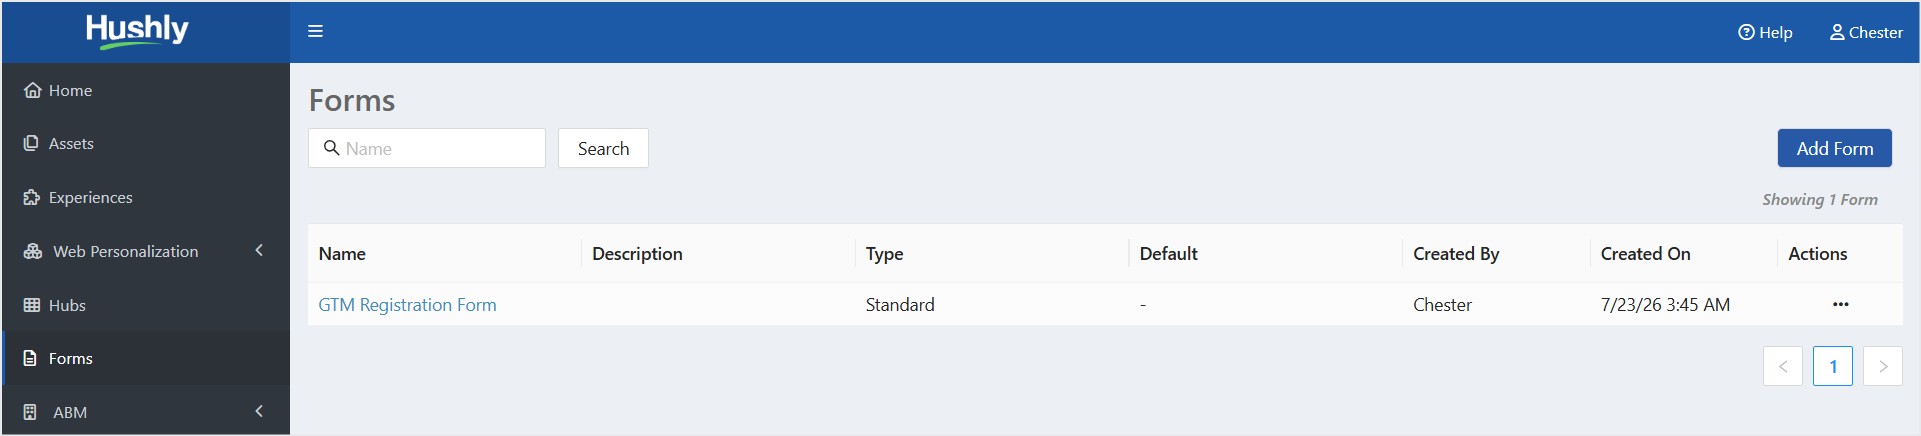
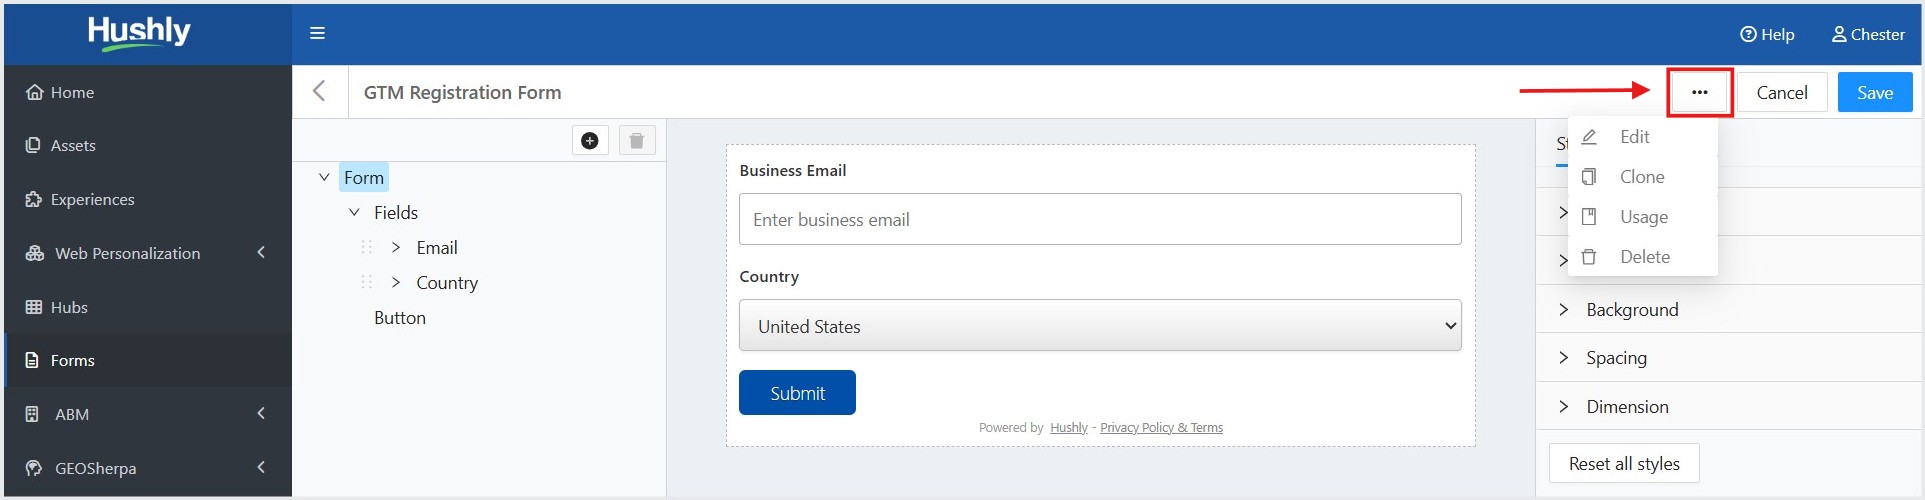
- Additional Options: Click the three-dot menu to edit, clone, view usage, or delete the custom form.
Related Articles:
Was this article helpful?
That’s Great!
Thank you for your feedback
Sorry! We couldn't be helpful
Thank you for your feedback
Feedback sent
We appreciate your effort and will try to fix the article